This guide walks through your full journey inside Rasayily, step by step — from opening your account to running confident campaigns and managing customer replies — based strictly on features that actually exist in the platform today. No technical background needed.
In this guide:
What is Rasayily · Start here · Before you start · Terms · Account · Plan · Connect WhatsApp · Contacts · Templates · Campaigns · First campaign in 10 minutes · Results · Customer service · Staff & permissions · Stores · Advanced features · Practical examples · Best practices · Common problems · What do you want to do? · FAQ
What Is Rasayily?
Rasayily is a communication platform that helps your business send WhatsApp messages (and other channels like SMS and email once enabled) to your customers in an organized way: it stores your contacts, lets you build ready-made message templates, sends them as a campaign to a group of customers at once or on a schedule, then shows you who received the message and who didn't. It also lets you manage customer replies and respond to them from one place.
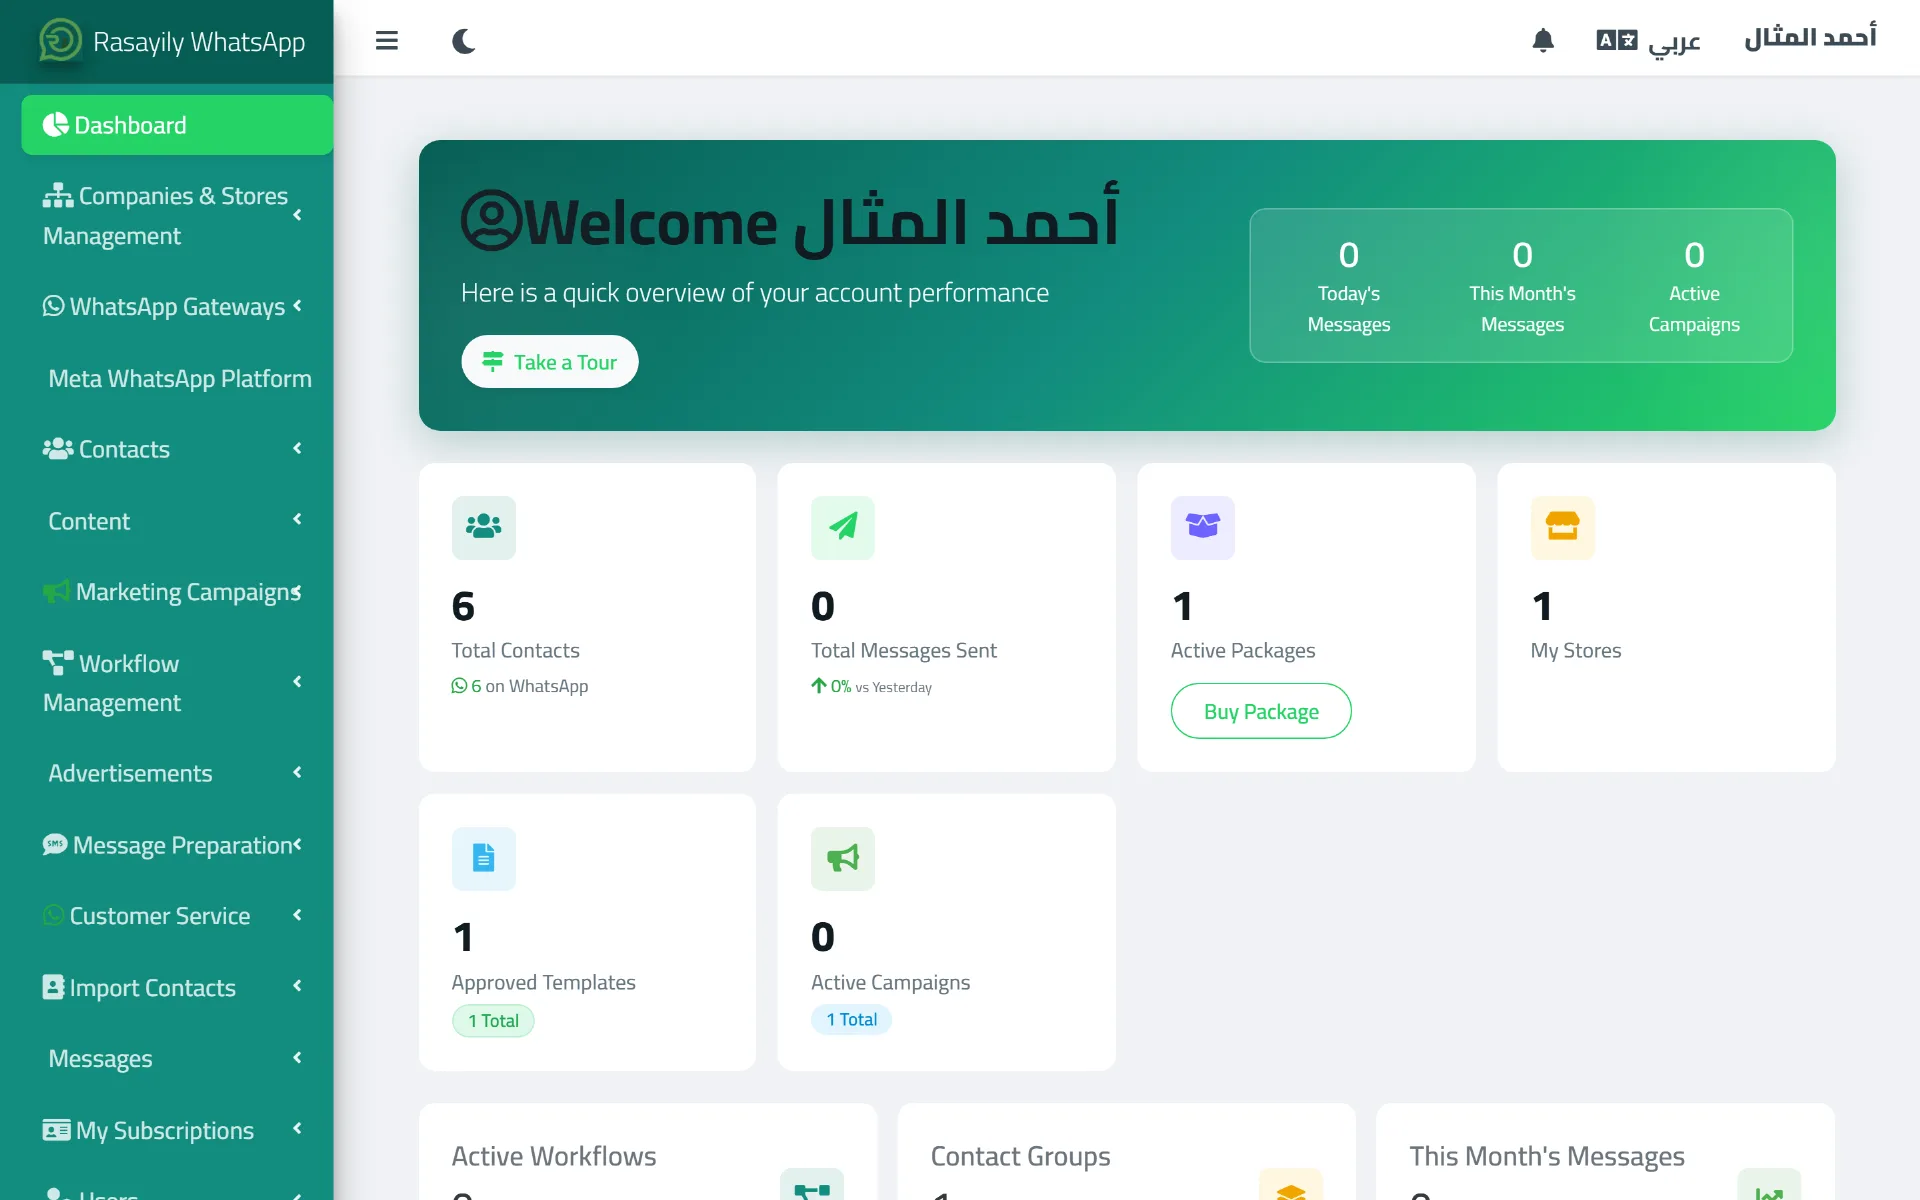
The dashboard gives you a quick snapshot of your account — contacts, approved templates, active campaigns — plus direct access to every section from the sidebar.
Start Here
If this is your first visit, follow this path in order. Each step links to its detailed section further down this guide.
- Create your account
- Activate a plan
- Connect WhatsApp
- Add contacts
- Create/choose a template
- Create your first campaign
- Send the campaign (10-minute quick start)
- Track results
- Handle customer replies
- Move on to advanced features
What You Need Before You Start
- An activated Rasayily account.
- A WhatsApp number suited to the connection method you'll pick (an official WhatsApp Business number for the Meta connection, or a regular active WhatsApp number for the QR connection).
- A customer list (an Excel file or a Google Contacts account) if you plan to message a large group.
- An approved Meta template if you'll send through the official WhatsApp channel (Meta Cloud API).
- A plan that covers the message volume and number of users you need.
Terms You'll See in This Guide
- Provider: the technical service Rasayily actually uses to deliver your messages to your customer (for example Meta, or one of the QR-based connection providers).
- Template: a ready-made message with variables like the customer's name, used instead of typing every message by hand.
- Campaign: the process of sending a message (or set of messages) to a group of contacts at once or on a schedule.
- Fallback channel: a backup sending channel (like SMS) used automatically when a message fails on the primary channel.
- Segment: a group of customers selected automatically based on conditions you set (e.g. has WhatsApp, not contacted in the last 30 days).
- Custom field: extra data you store per customer (like a birthday or membership number) to personalize messages.
- Team: a working group inside customer service used to distribute conversations among your staff.
- API: a way for a developer to connect Rasayily to other software directly through code.
- Automation / n8n: connecting Rasayily to the external automation tool n8n to run automatic scenarios when messages arrive or are sent.
1. Creating Your Account
Sign up from the registration page. You only need: your name, email, password, company name, and phone number. You also choose how to activate your account — by email or by WhatsApp. You can also sign up directly with Google or Facebook.
No credit card or payment details are required at sign-up. Your account is created for free, and a free plan is activated automatically once your account is verified.
What happens after you click "Create Account"? The system creates your account and company, and sends you a verification message (email or WhatsApp, depending on your choice). Once verified, you're taken straight into the dashboard with the free plan already active.
2. Free Plan and Paid Plans
Once your account is confirmed, a free plan is activated automatically with no manual step needed. Later, you can upgrade from the plans page based on your needs for message volume, users, and stores, or assemble a custom plan by picking only the features you need. Each plan has its own limits, and some features (like provider rotation or the n8n connection) may require a plan that supports them specifically.
You can track your subscriptions and invoices from the "My Subscriptions" section in the sidebar: your past purchases, buying a new subscription, and your invoices. You can also turn auto-renewal on or off, or cancel your subscription, from the same page.
3. Connecting WhatsApp
Connecting WhatsApp in Rasayily happens on two different pages, depending on the connection method you choose:
- Official Meta connection (WhatsApp Cloud API): from the Meta WhatsApp Platform page. It requires a Meta-verified business account and a WhatsApp Business number, and the connection itself happens through Meta's official sign-up flow right on this page. Once connected, you manage your number, business profile, and Meta templates from the same page — this method gives you officially approved templates and higher reliability.
- QR-code connection: from the WhatsApp connection page. You scan a QR code from your phone's regular WhatsApp, no Meta approval needed. From the same page you can track connection status, restart the session, or log out and disconnect the number when needed.
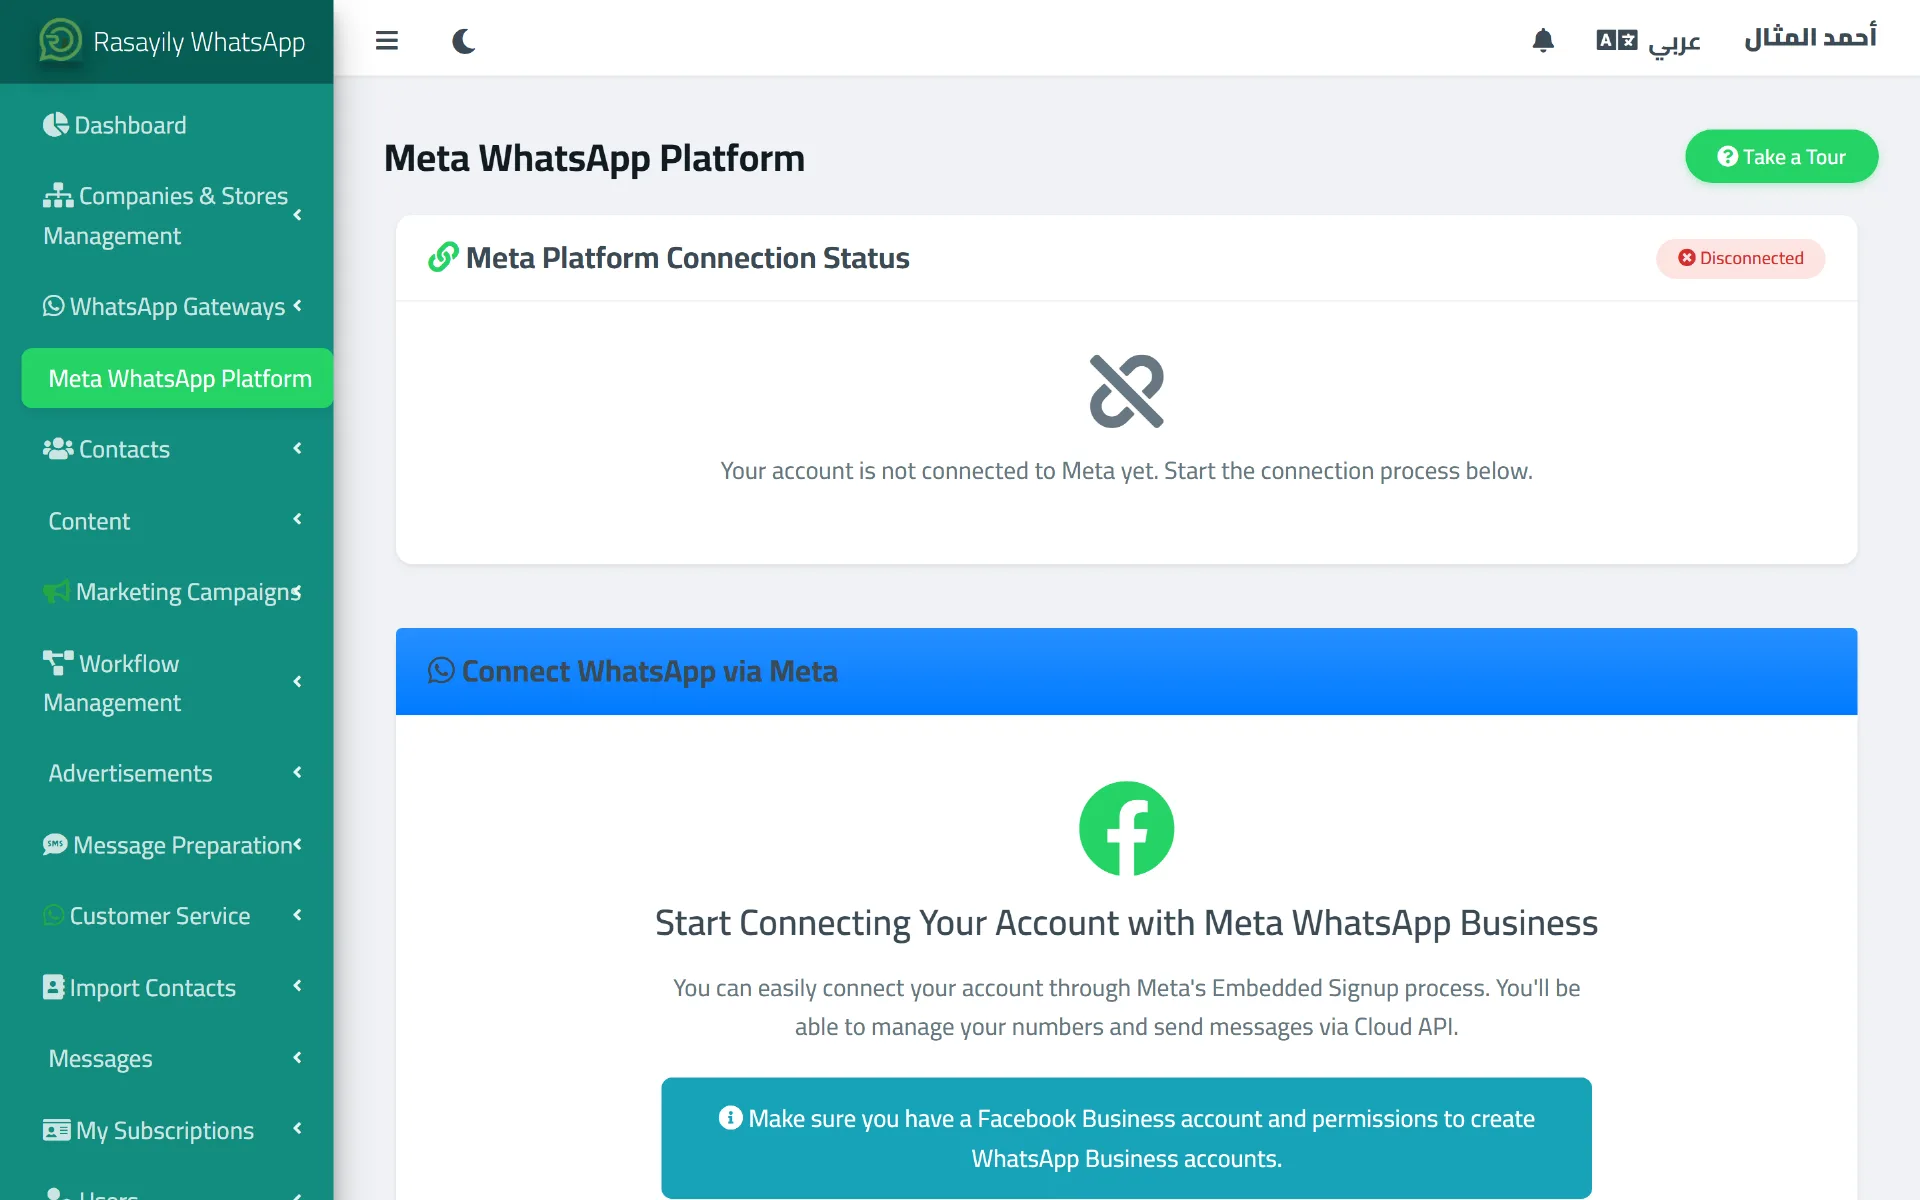
From the Meta WhatsApp Platform page you start the official Meta connection using your Facebook Business account.
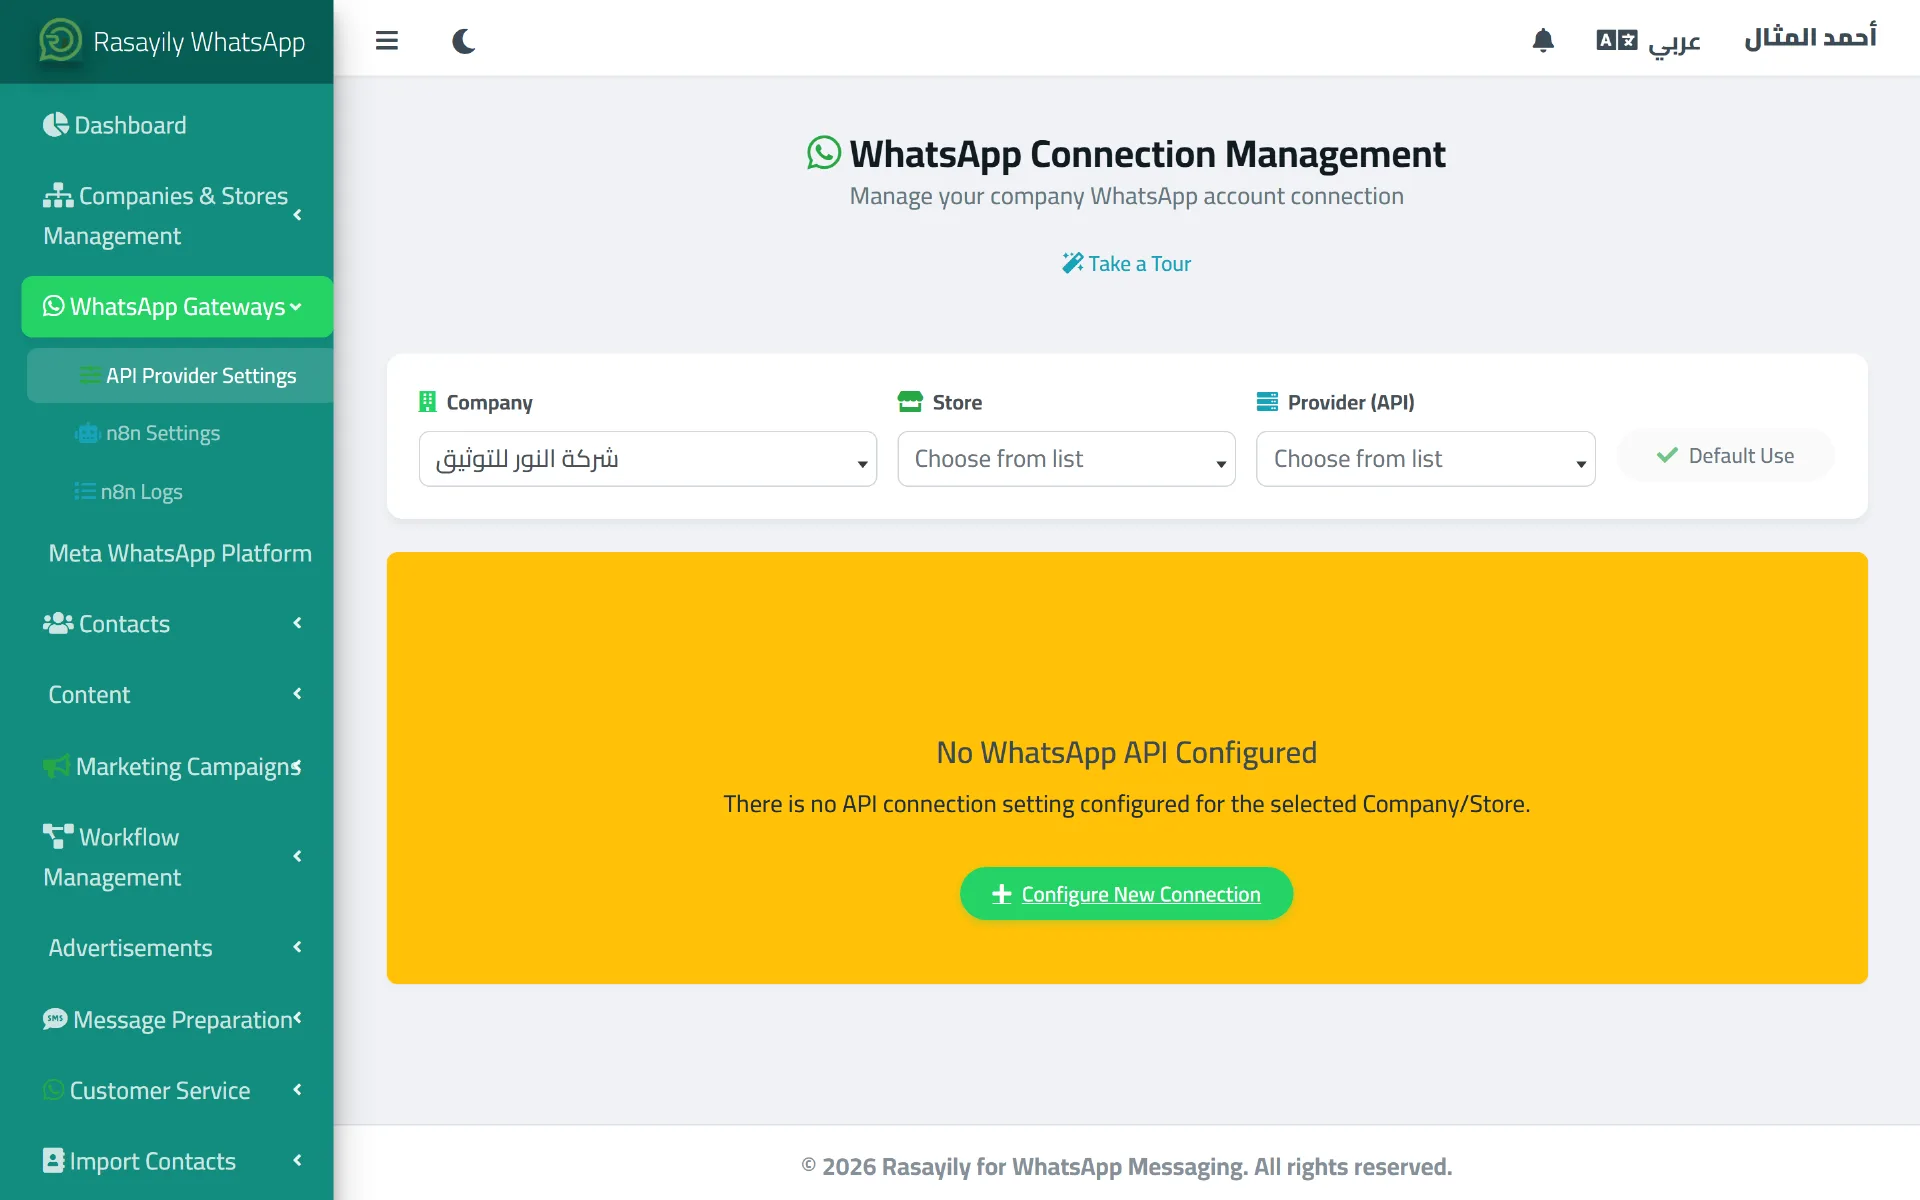
From the WhatsApp connection page you pick the company and store, then add a new connection — once configured, this is also where the QR code and session status appear.
These are two completely separate pages: use the Meta WhatsApp Platform page only if you're connecting an official WhatsApp Business number through Meta, and use the WhatsApp connection page for QR-based connections through other providers.
For the full breakdown of the difference between the two methods, what a "provider" is and how it works, and how automatic failover between providers works when something goes wrong, see Providers and Automatic Failover in Rasayily.
4. Adding and Organizing Contacts
From the contacts page, you can add customers one by one, or import them in bulk using two real methods available today:
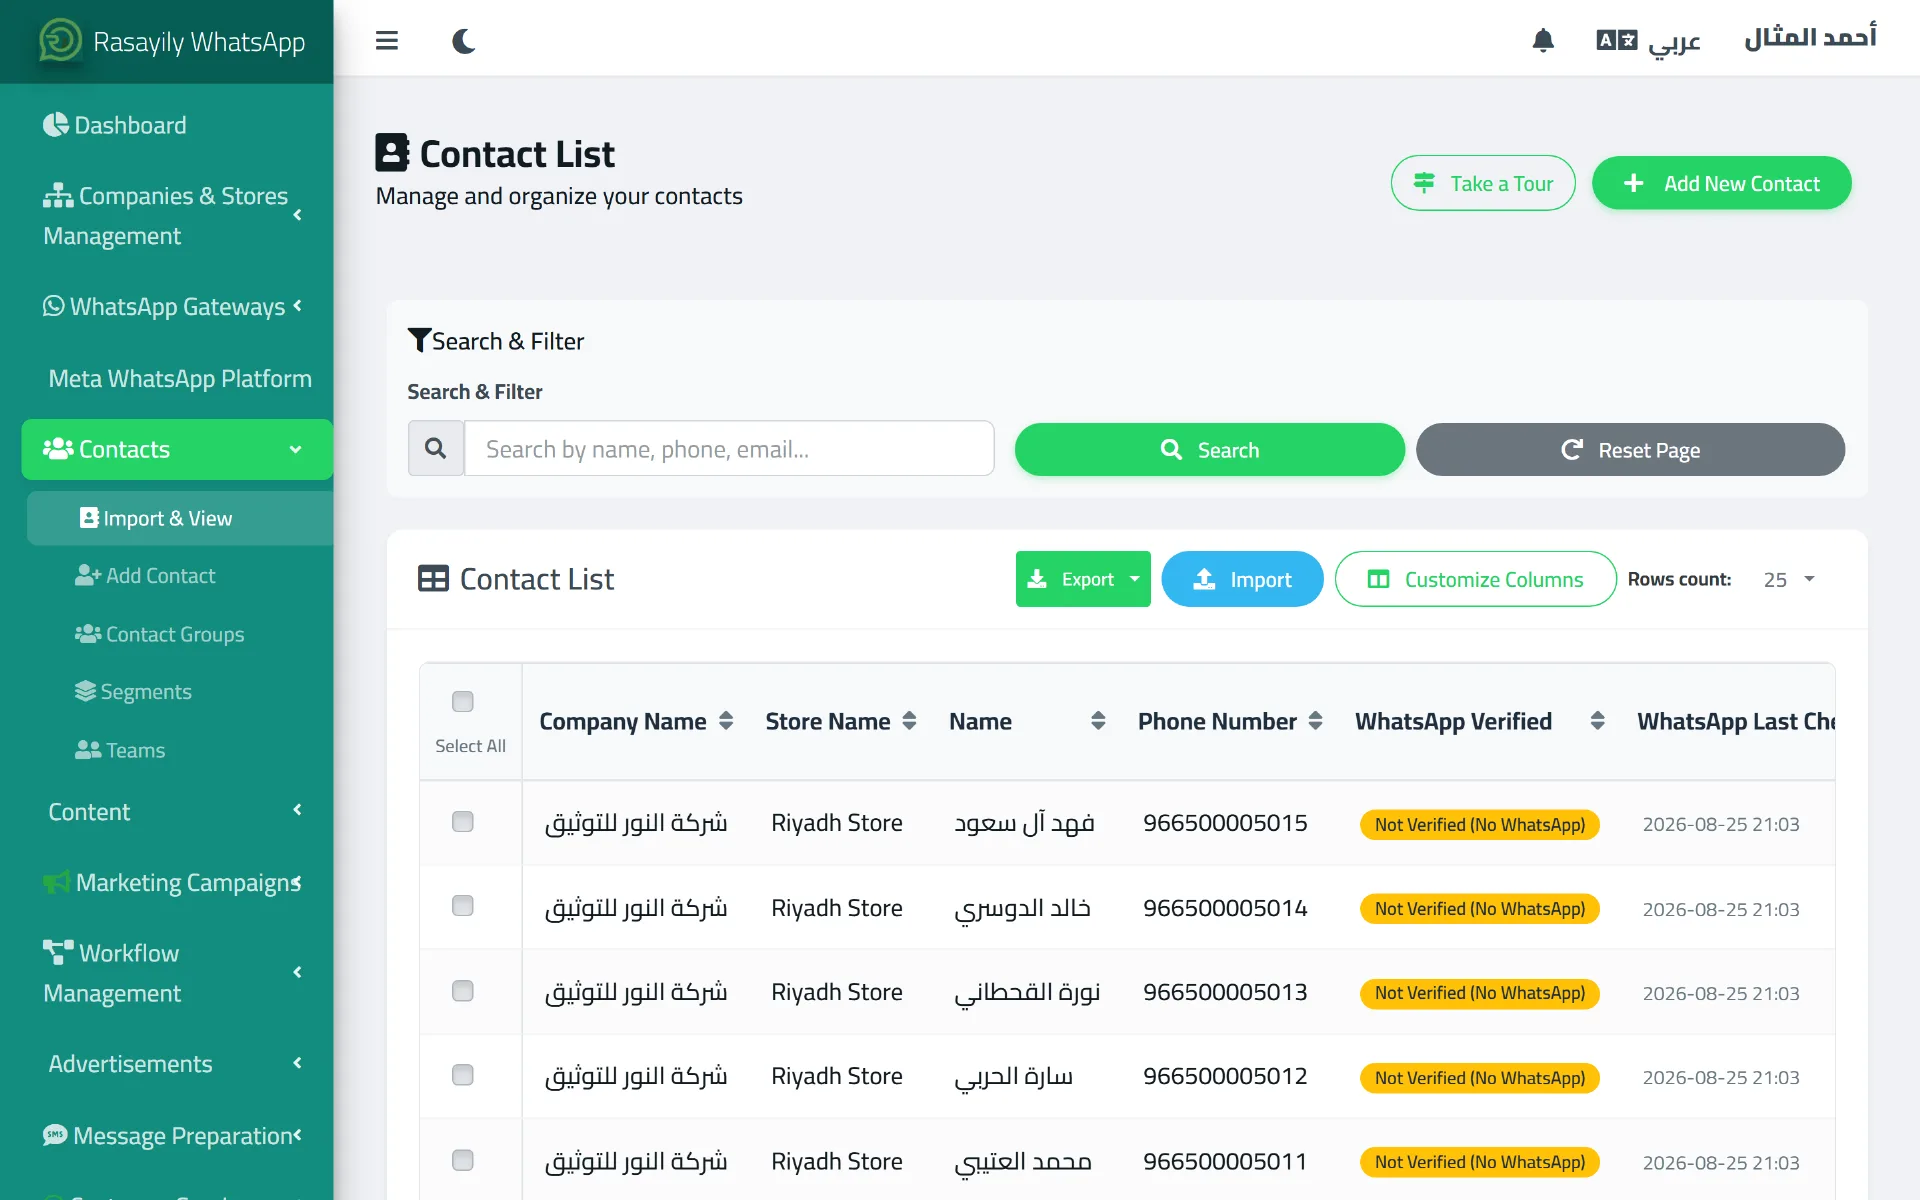
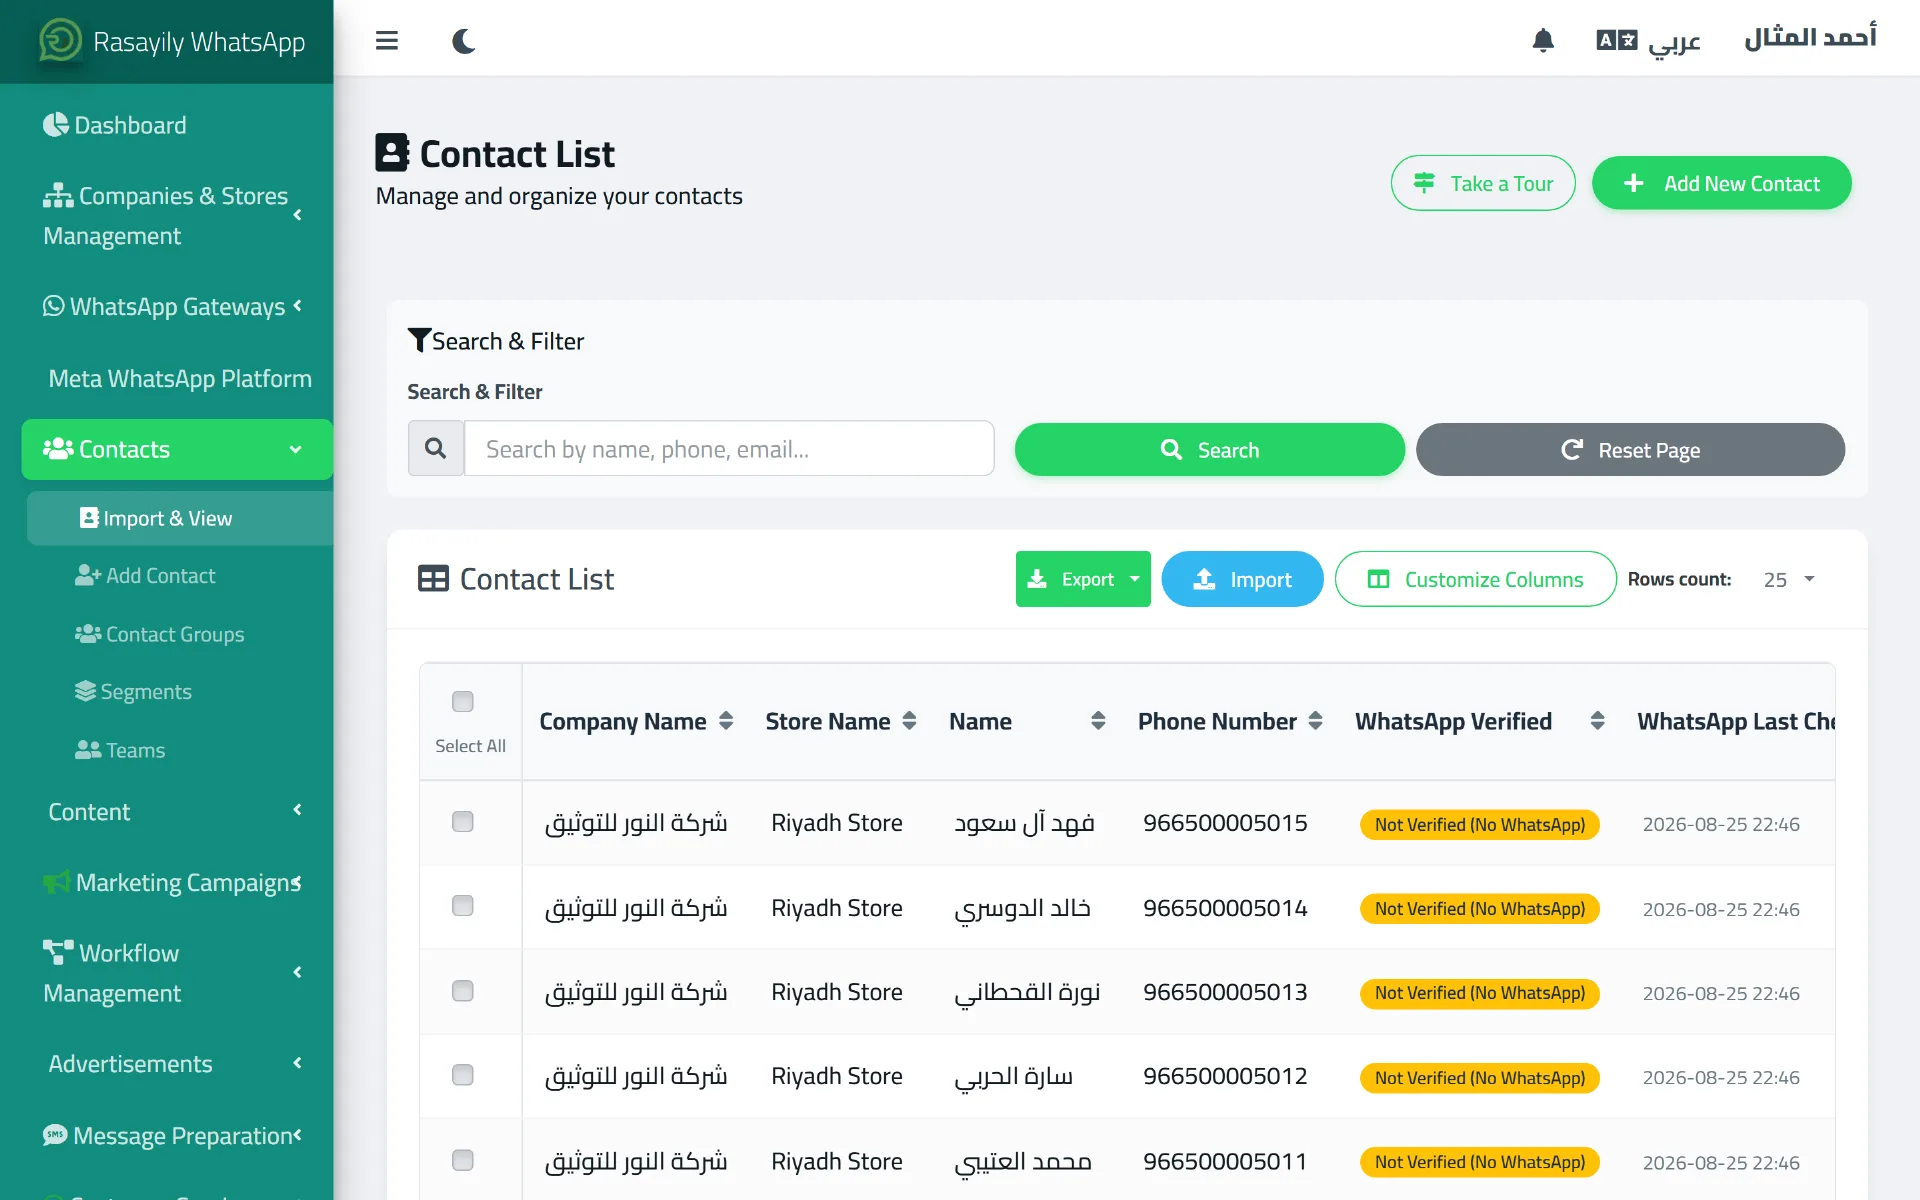
The contacts page is where you manage every customer: search and filter, import from a file, or add contacts manually.
- Excel import: download the ready-made template from the import page, then fill in these columns: Company Name, Store Name, Import Name, Group Name, Phone Number, Name, Message, Country, Region, City, Gender, Custom Fields, and Note. Phone number is the essential field for every contact. After upload, the system shows you a preview before confirming, and an import history page lets you track the status of every past import.
- Google Contacts import: connect your Google account directly and import contacts, with options to pick a target group, handle duplicates, send an automatic welcome message, and verify whether the number is active on WhatsApp.
Common mistake: importing untrusted numbers, or people who never opted in, raises your failure rate and hurts your account's standing with sending providers. Only import real contacts who agreed to hear from you.
After importing, organize your customers with three tools:
- Contact Groups: a static classification for contacts, from the contact groups page.
- Segments: a dynamic classification built on conditions (e.g. has WhatsApp, not contacted in the last 30 days), from the segments page — you can calculate a segment's size and test it before using it in a campaign.
- Custom fields: added per contact (e.g. birthday or membership number) and used later to personalize message text — set them via the "Custom Fields" column when importing an Excel file.
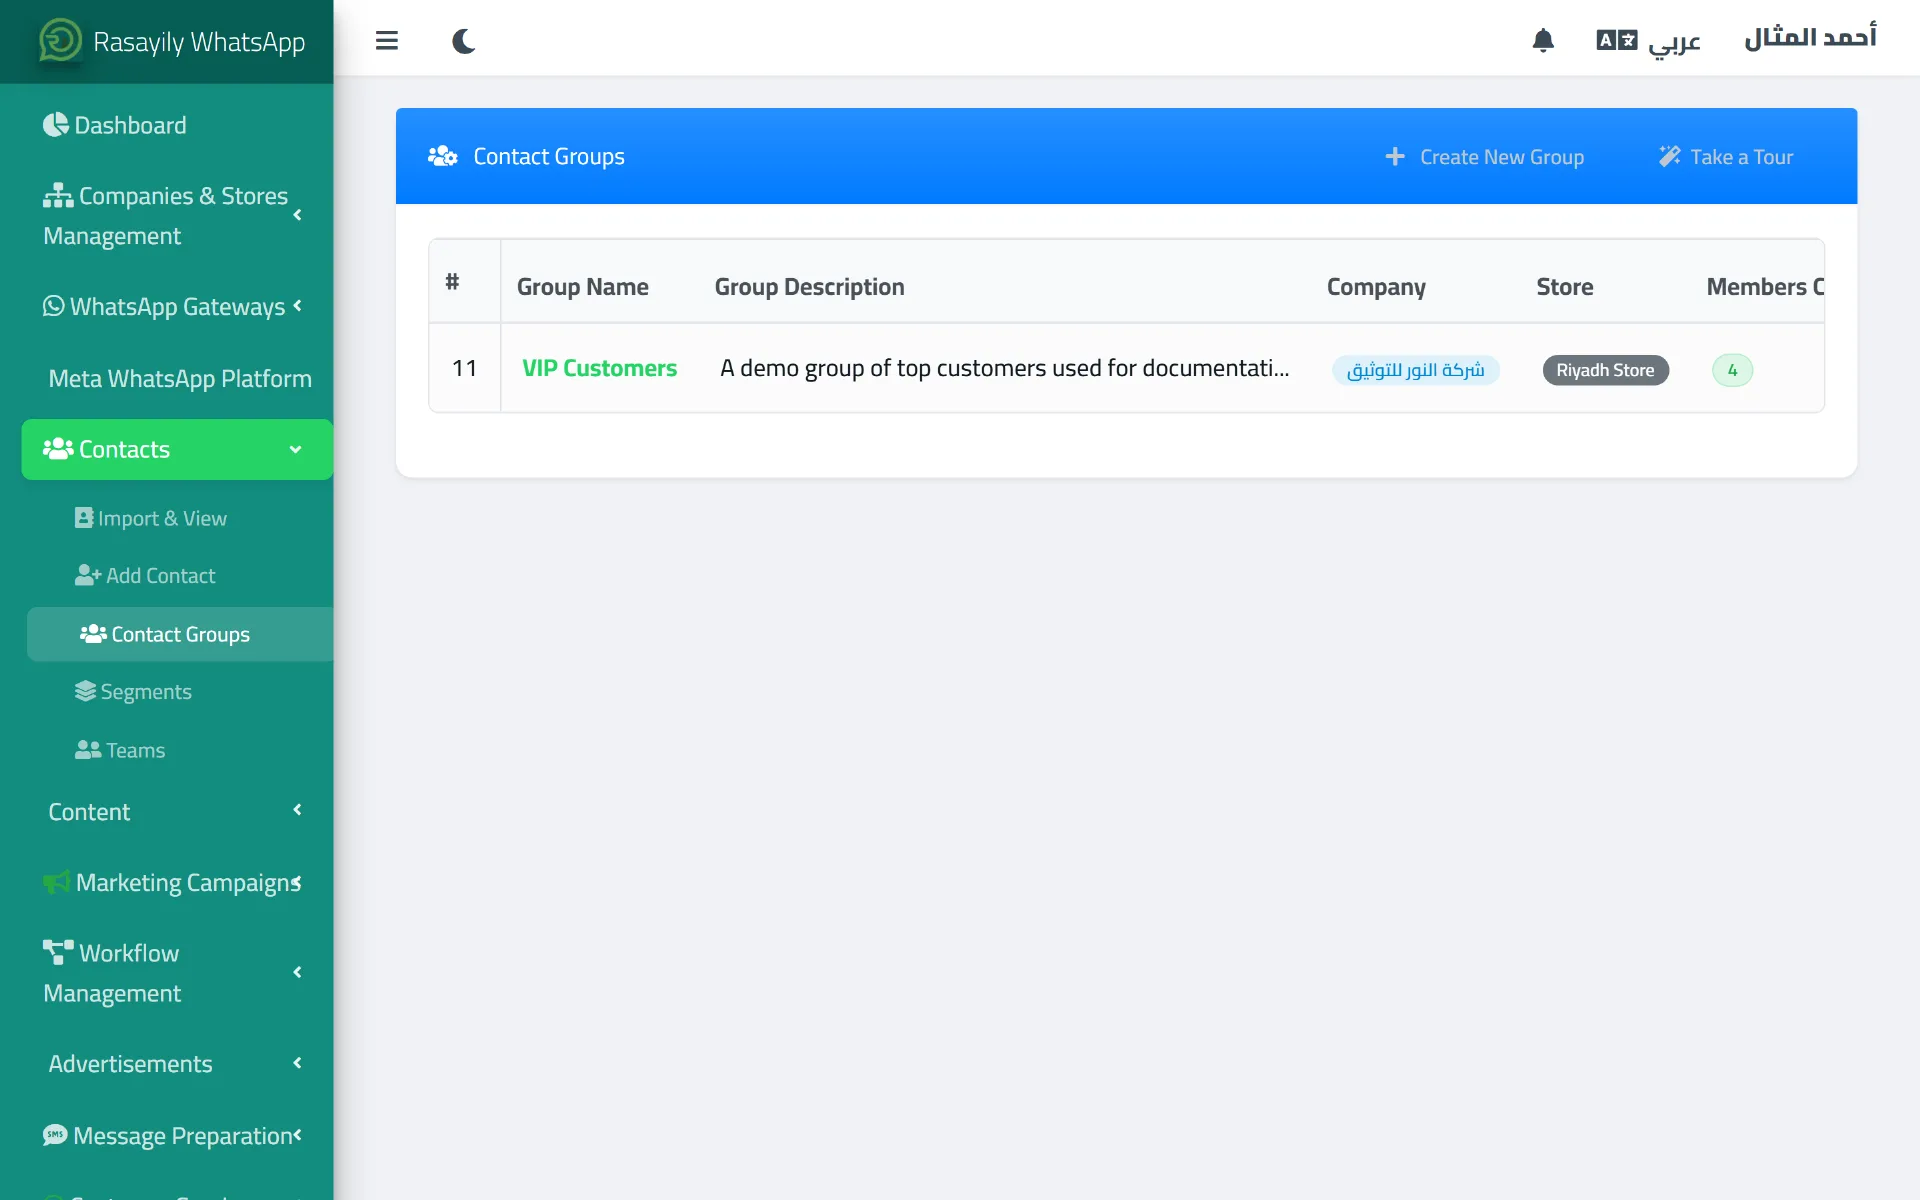
The contact groups page is where you create a new group and track its member count, company, and store.
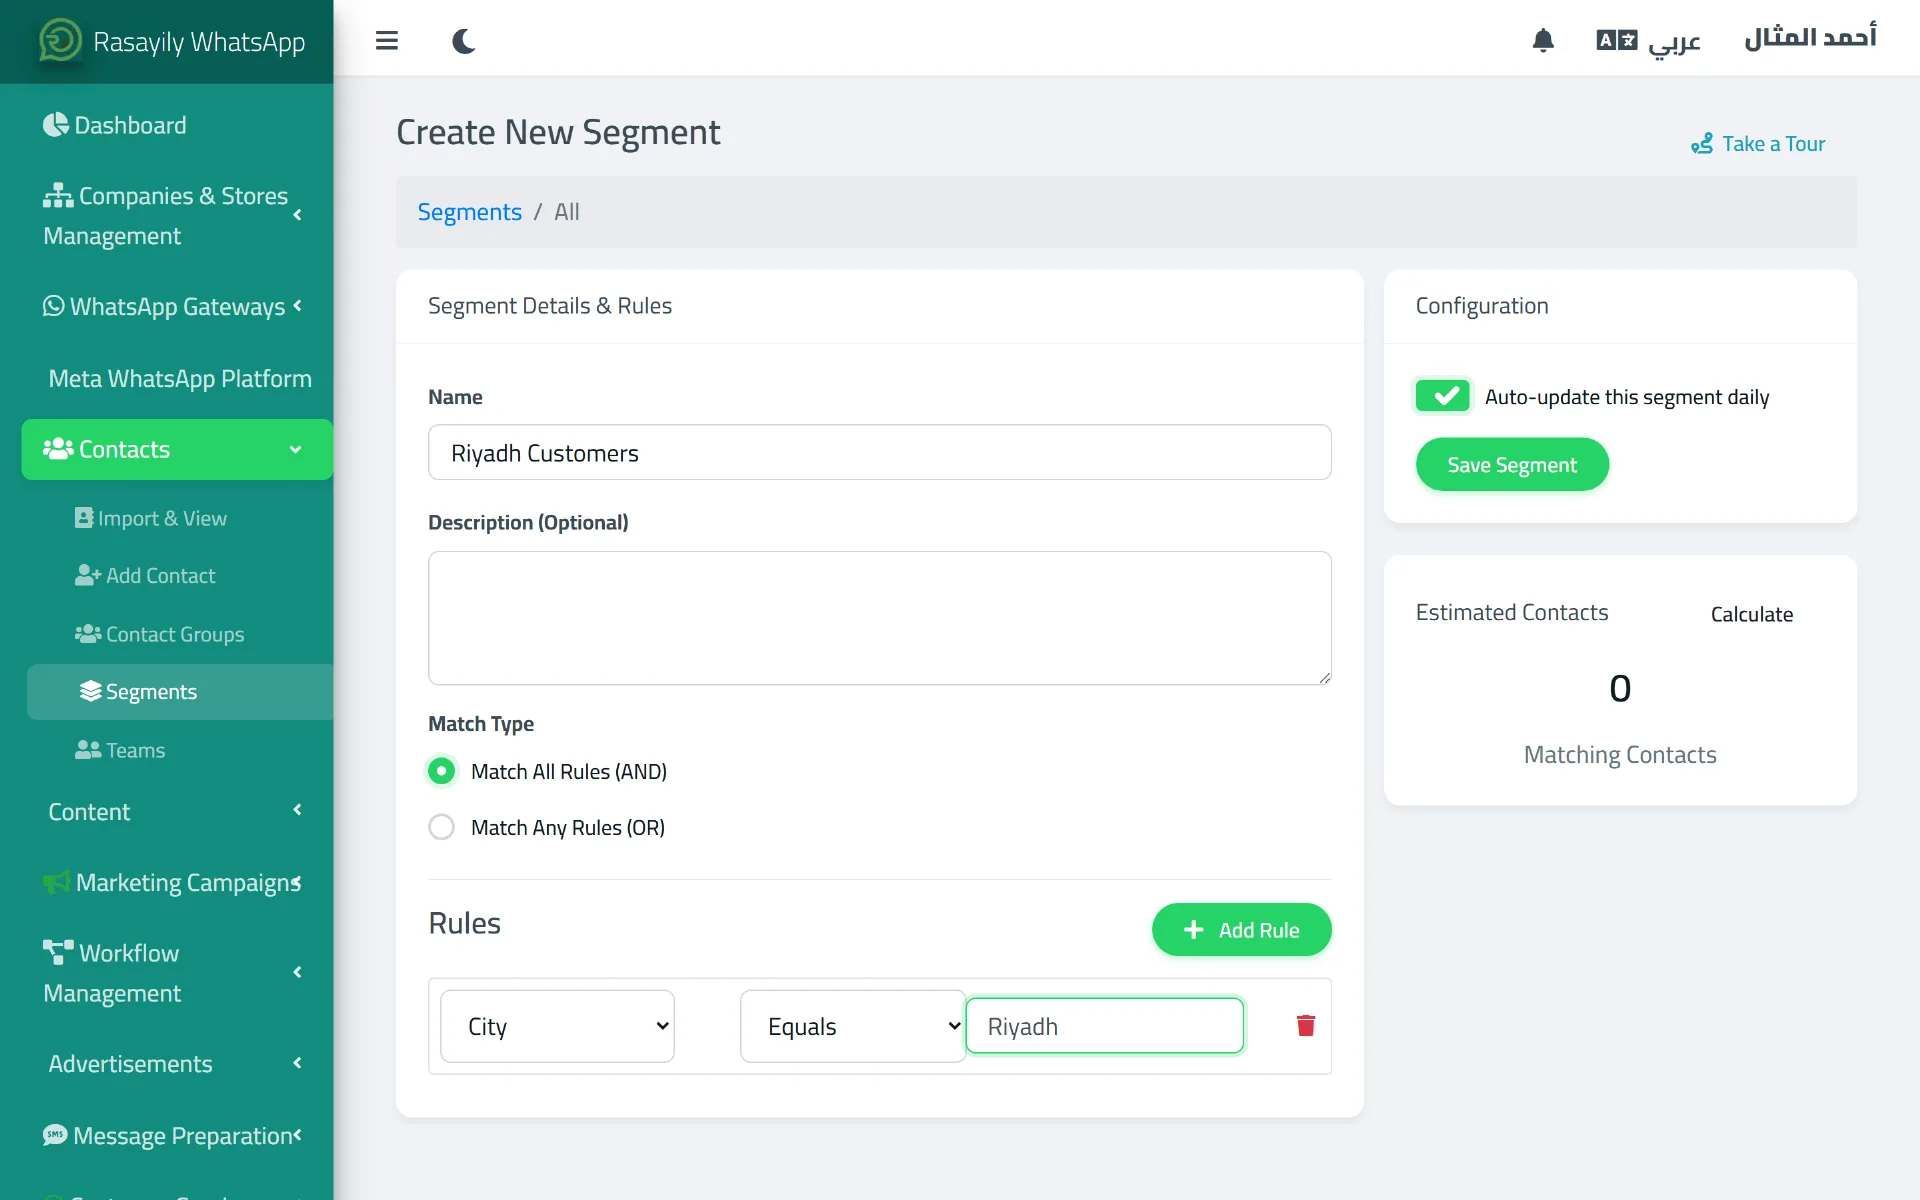
When creating a segment you choose the field, condition, and value (here: City equals Riyadh), and Rasayily calculates the matching contact count automatically.
While importing an Excel file, you map each column to a matching field in Rasayily — including a "Custom Fields" column that stores extra data per contact.
➡️ Next step: once your contacts are organized, move on to Templates to create the message you'll use in your campaign.
5. Templates
From the templates page, there are two real template types in Rasayily:
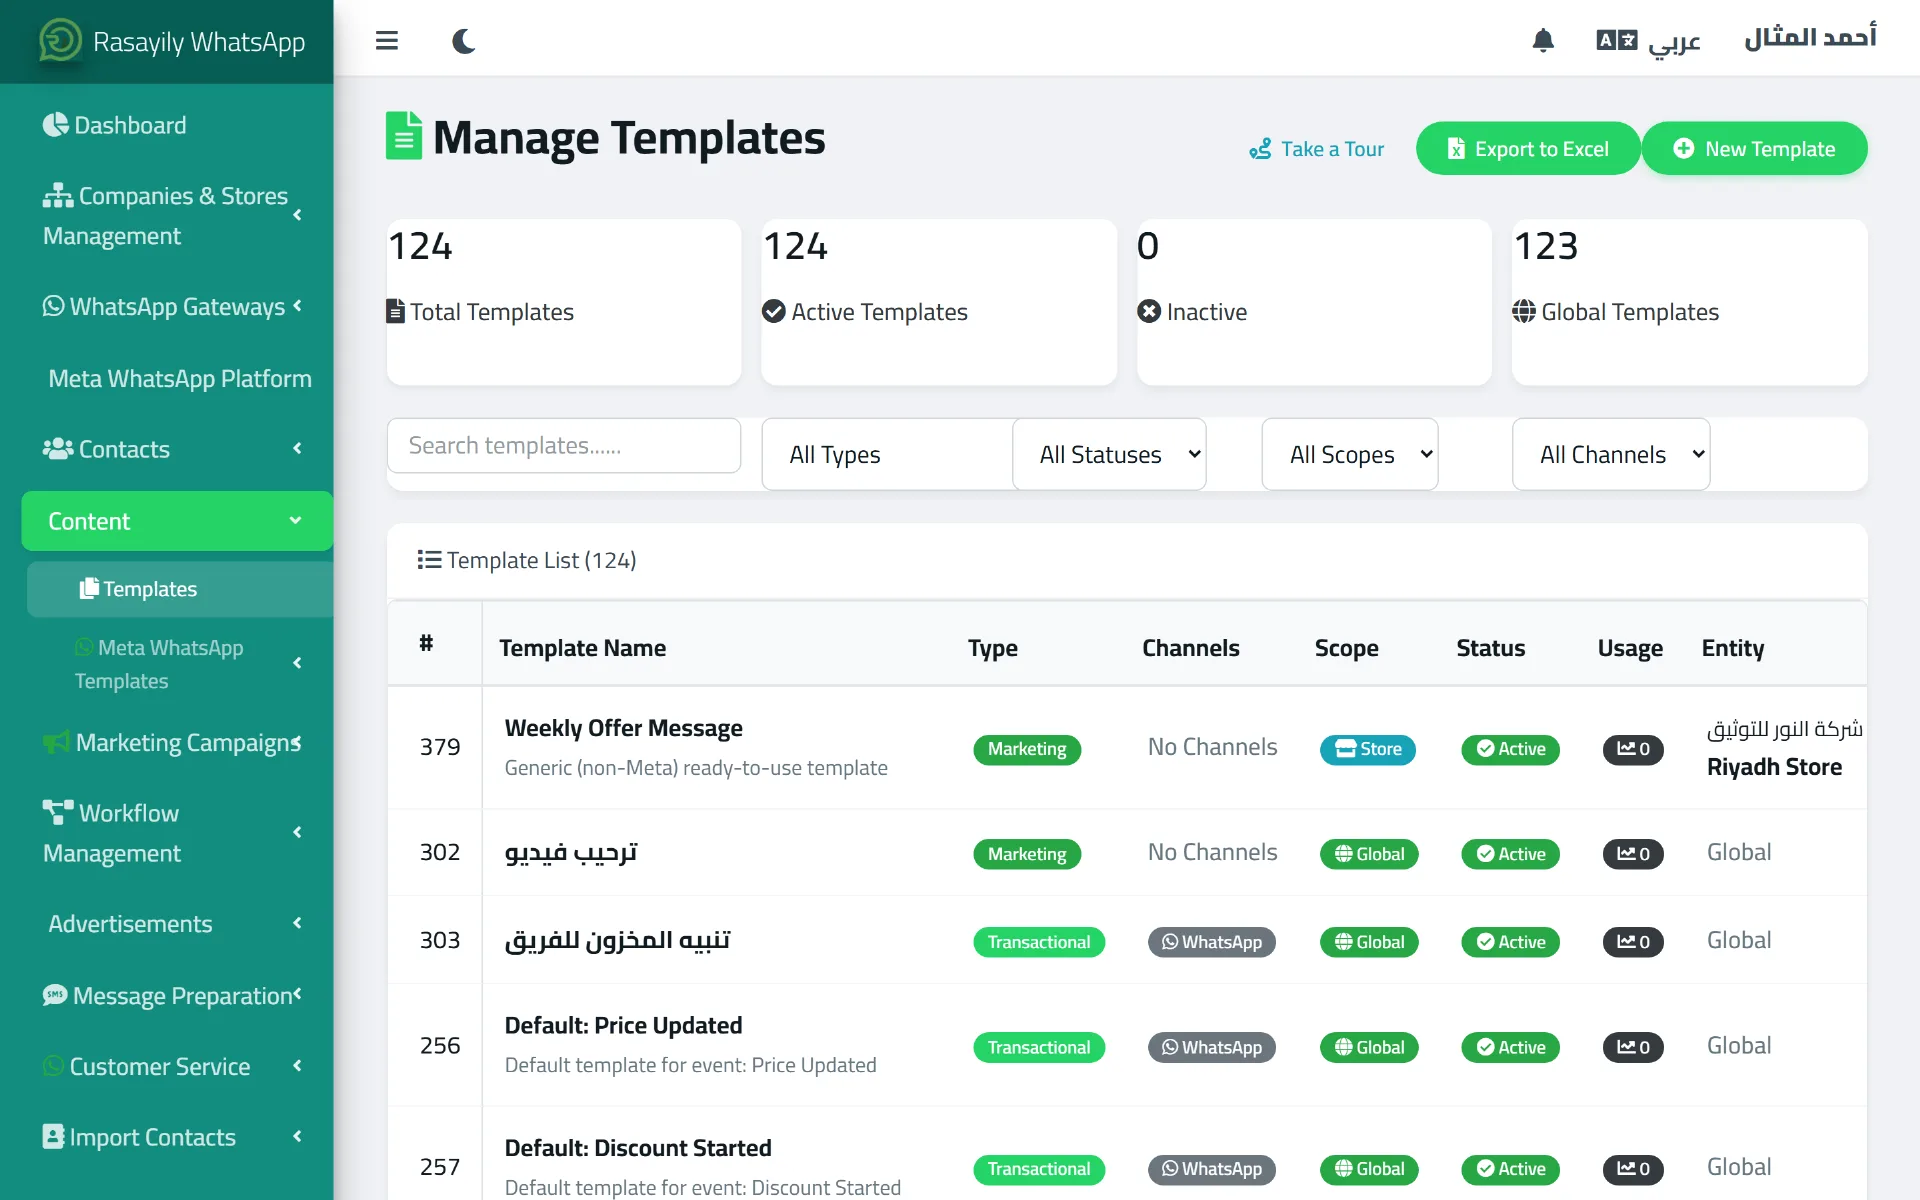
The templates page lists every template you can use — your own and the system's ready-made ones — along with its type, status, and channel.
- Meta (WhatsApp Business) templates from the Meta templates page: go through an official approval status (pending, approved, rejected, paused, or disabled) and a category (marketing, utility, or authentication) before they're usable in official Meta campaigns.
- Generic (non-Meta) templates: don't go through Meta's approval flow, and are used with other, unofficial connection providers or with SMS/email channels. They support multiple language translations, internal versions that can be approved or rejected, and a live preview plus test-send before you use the template in a real campaign.
If your campaign will send through Meta Cloud API, the template must be a "Meta template" with an "approved" status — generic templates are not accepted on that channel.
➡️ Next step: once your template is ready (or approved, for Meta templates), move on to creating your campaign to actually use it.
6. Creating and Sending a Campaign
From the new campaign page, you set:
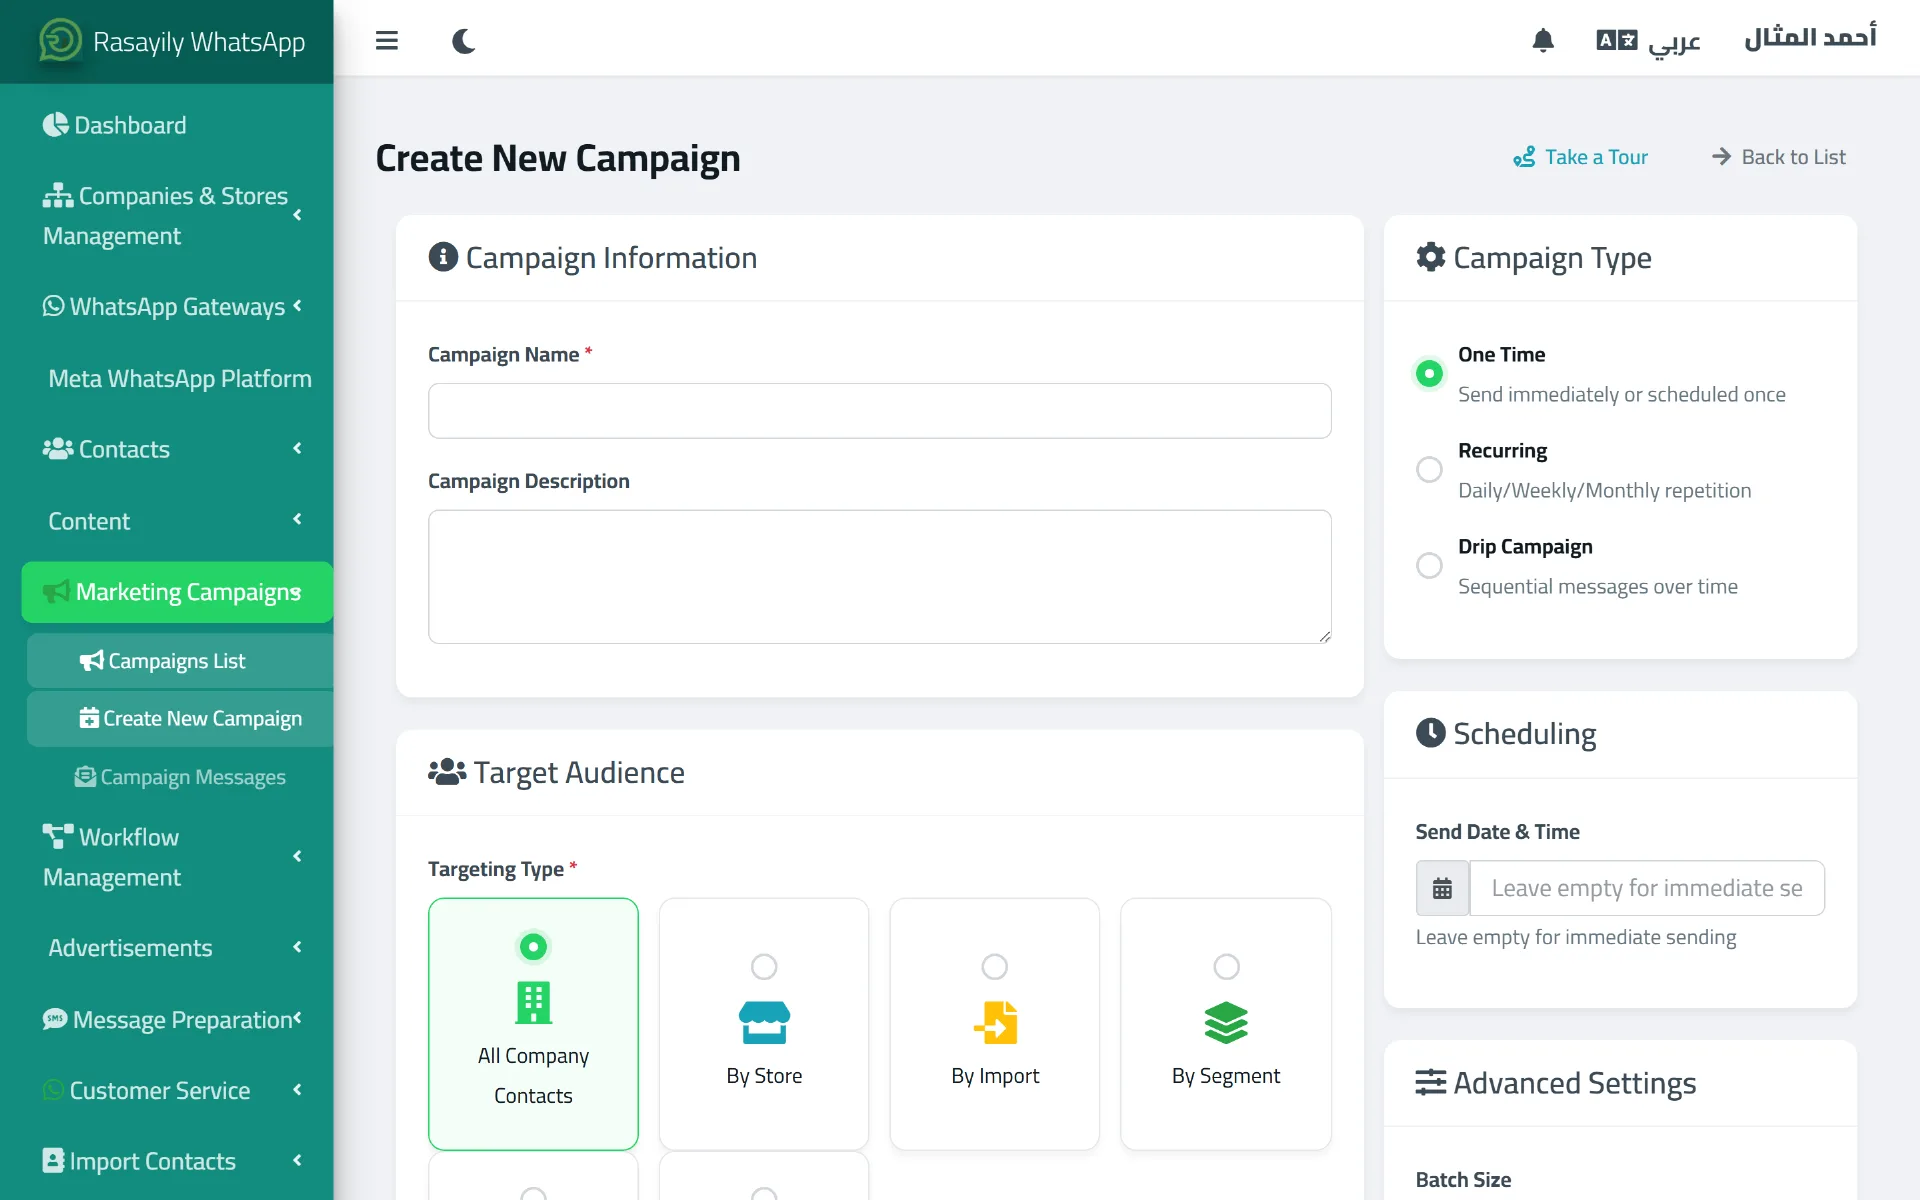
The campaign creation form is where you set the name, type (one-time, recurring, or drip), target audience, and send schedule.
- Channel: WhatsApp, SMS, or email, depending on what's enabled for you.
- Fallback channel: optional — for example, WhatsApp as the primary channel and SMS as the fallback. When a message fails to send through the primary channel after several attempts, the system automatically sends a new message to the same recipient through the fallback channel, provided an active provider exists for that channel.
- Template: pick the template, then map its variables (like name) to the matching contact fields.
- Target audience: a segment, a group, a specific imported file, all contacts, or all contacts for a given company/store — plus extra filters like "has WhatsApp," "not blocked," or "not contacted in the last N days."
- Provider strategy: a default provider, a specific one, or rotating the send across several providers (availability depends on your plan).
- Timing: send immediately, schedule for later, or set up a recurring campaign (daily/weekly/monthly).
- Staged sending (optional): instead of sending the whole campaign at once, spread it out gradually — a fixed daily cap, a gradual daily increase, or splitting the total recipients across a set number of days, with the option to define allowed time windows and days.
- Drip campaign: a completely different type from "staged sending" above — instead of spreading the same message over days, it sends each customer a sequence of different messages in a set order (e.g. a welcome message right away, a follow-up one day later, then an offer three days after that), with its own template and delay-after-the-previous-step chosen per message.
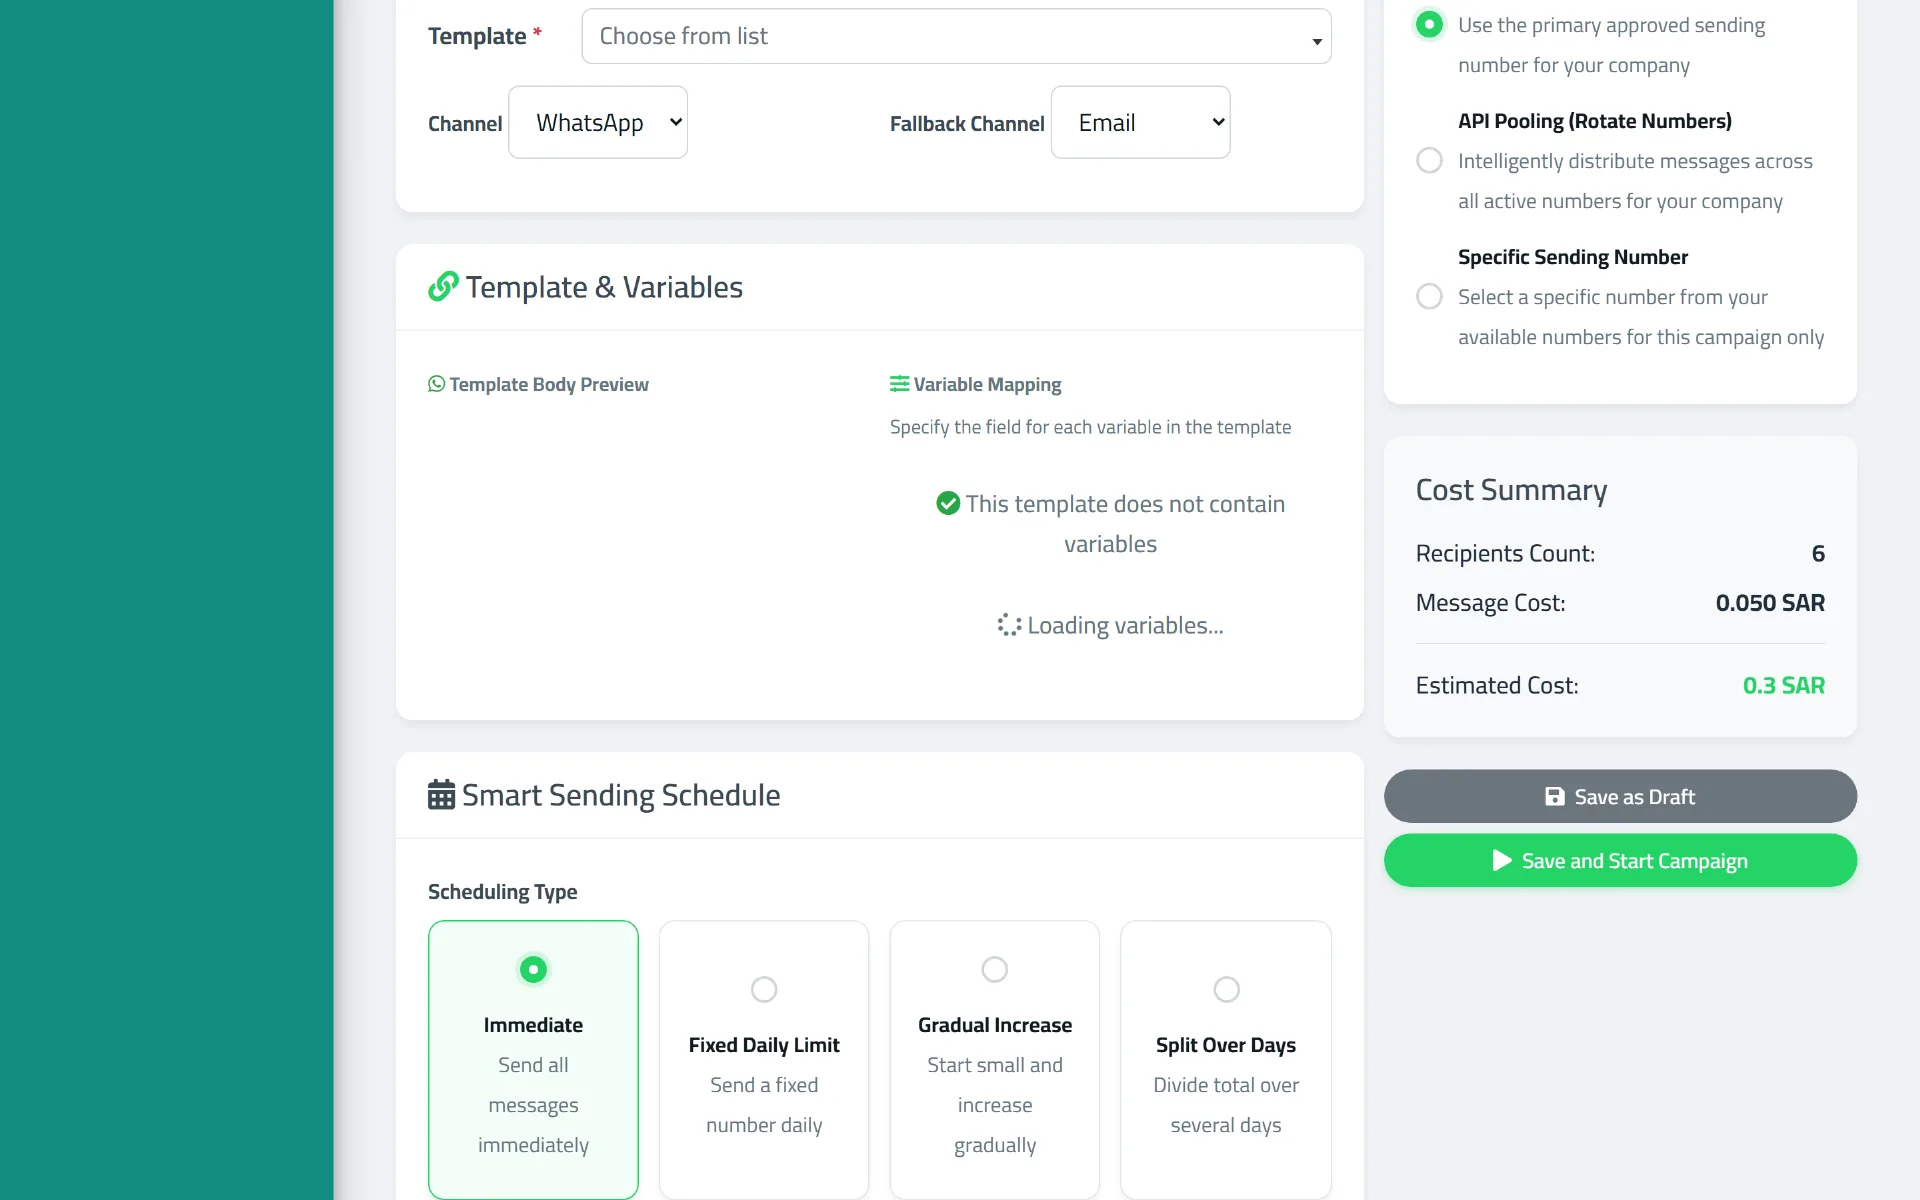
From the same Template & Channel section you choose the primary channel and a fallback channel (the available options depend on which providers are active on your account).
With the fallback channel ready, the next step is to choose how and through which provider the campaign will be sent.
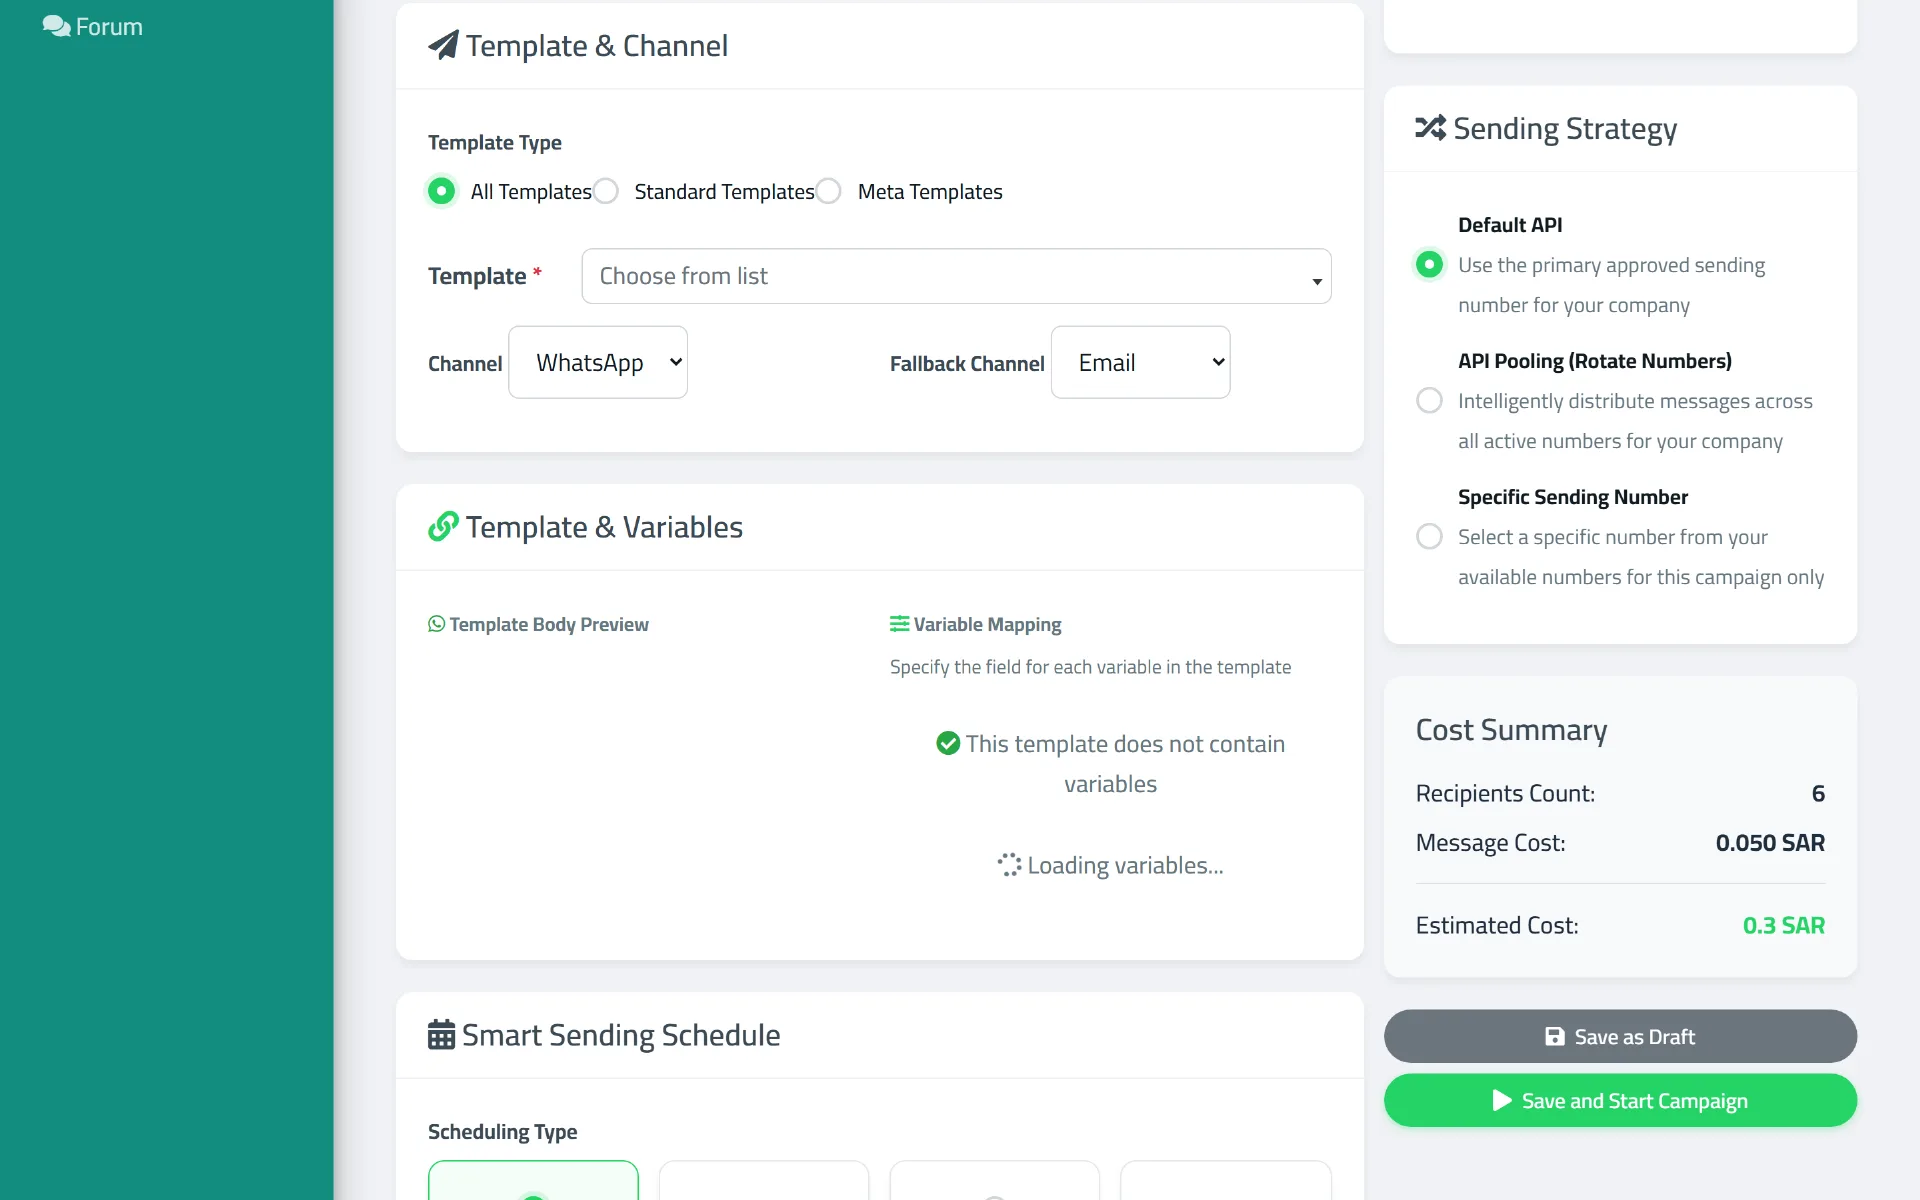
The Sending Strategy section is where you choose which provider sends the campaign: your default number, automatic rotation across your numbers, or one specific number for this campaign only.
Once the sending provider is chosen, set when and how the campaign should run.
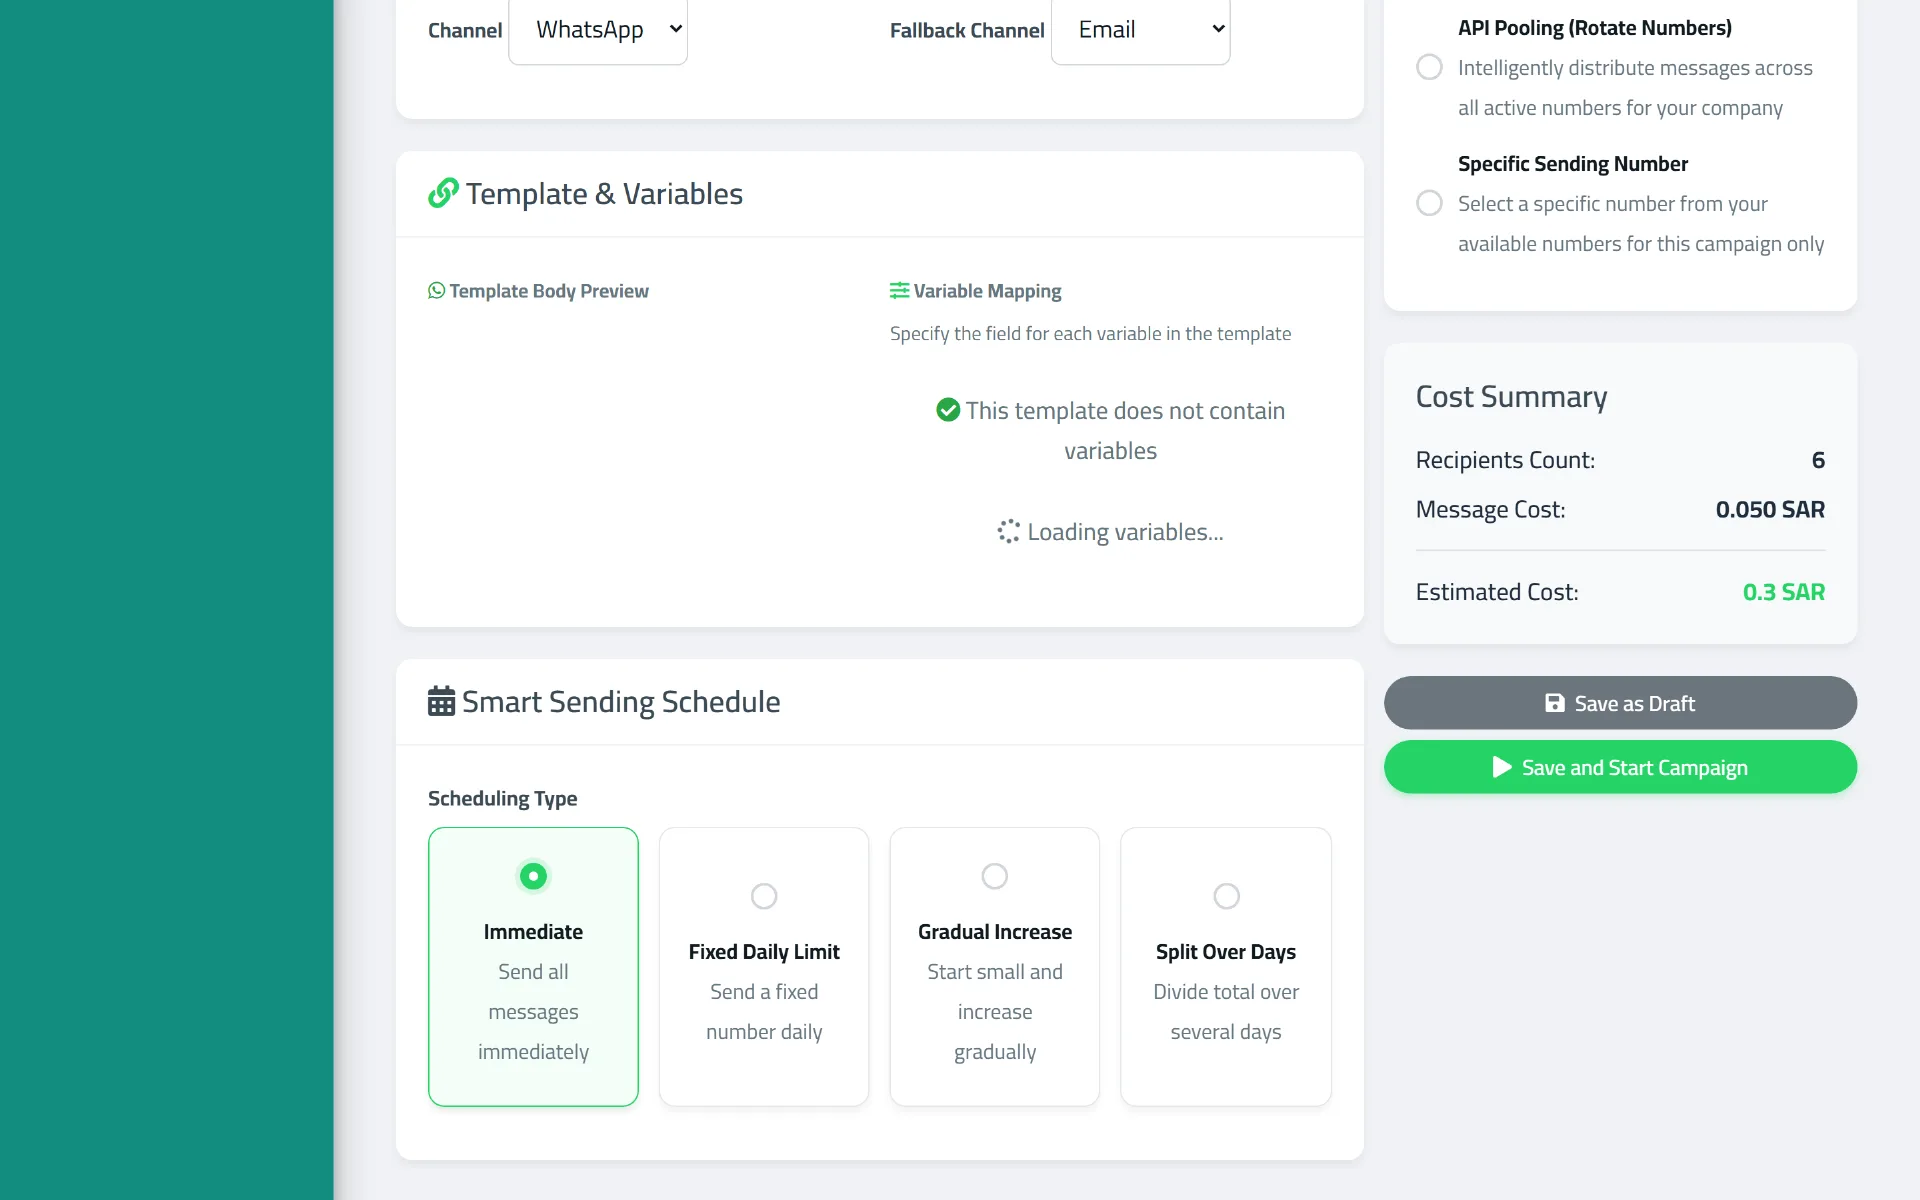
The Smart Sending Schedule section controls how fast your campaign sends: immediately, at a fixed daily cap, ramping up gradually, or spread across several days.
You can also set the batch size and the delay between batches, plus a cap on how often the same customer can be contacted within a given period, to reduce the risk of being blocked or annoying your audience.
What happens after you click "Send Campaign"? The system creates the campaign and starts preparing messages according to the settings you chose (immediate, scheduled, or staged), then begins actually sending them through the selected provider. You can track status live from the campaign details page, and pause, resume, or cancel it at any time.
For the full mechanics of the fallback channel and provider rotation, see the providers and failover article.
Send Your First Campaign in 10 Minutes
A quick practical summary of everything above, in execution order:
- Connect WhatsApp: the Meta WhatsApp Platform page for the official Meta connection, or the WhatsApp connection page for QR.
- Add your customers from the contacts page (manually, or import via Excel/Google).
- Create or pick a ready template from the templates page.
- Open create new campaign.
- Choose your target audience (a group, a segment, or all contacts).
- Choose the sending channel (and a fallback channel if you want one).
- Choose a provider (the default one is fine to start).
- Review the settings: template, audience, channel, timing.
- Click "Send Now" or set a schedule.
- Track the results live from the campaign details page.
7. Tracking Results and Failed Messages
Every campaign has a details and analytics page showing total messages sent, delivered, read, and failed, plus a detailed per-recipient message log with status (pending, sent, delivered, failed). You can also export the recipient list and their statuses. If some messages failed, you can resend just the failed ones with a single click from the same page, without recreating the campaign. There's also a general log of every message sent from your account (outside the campaign context) on the "Messages" page.
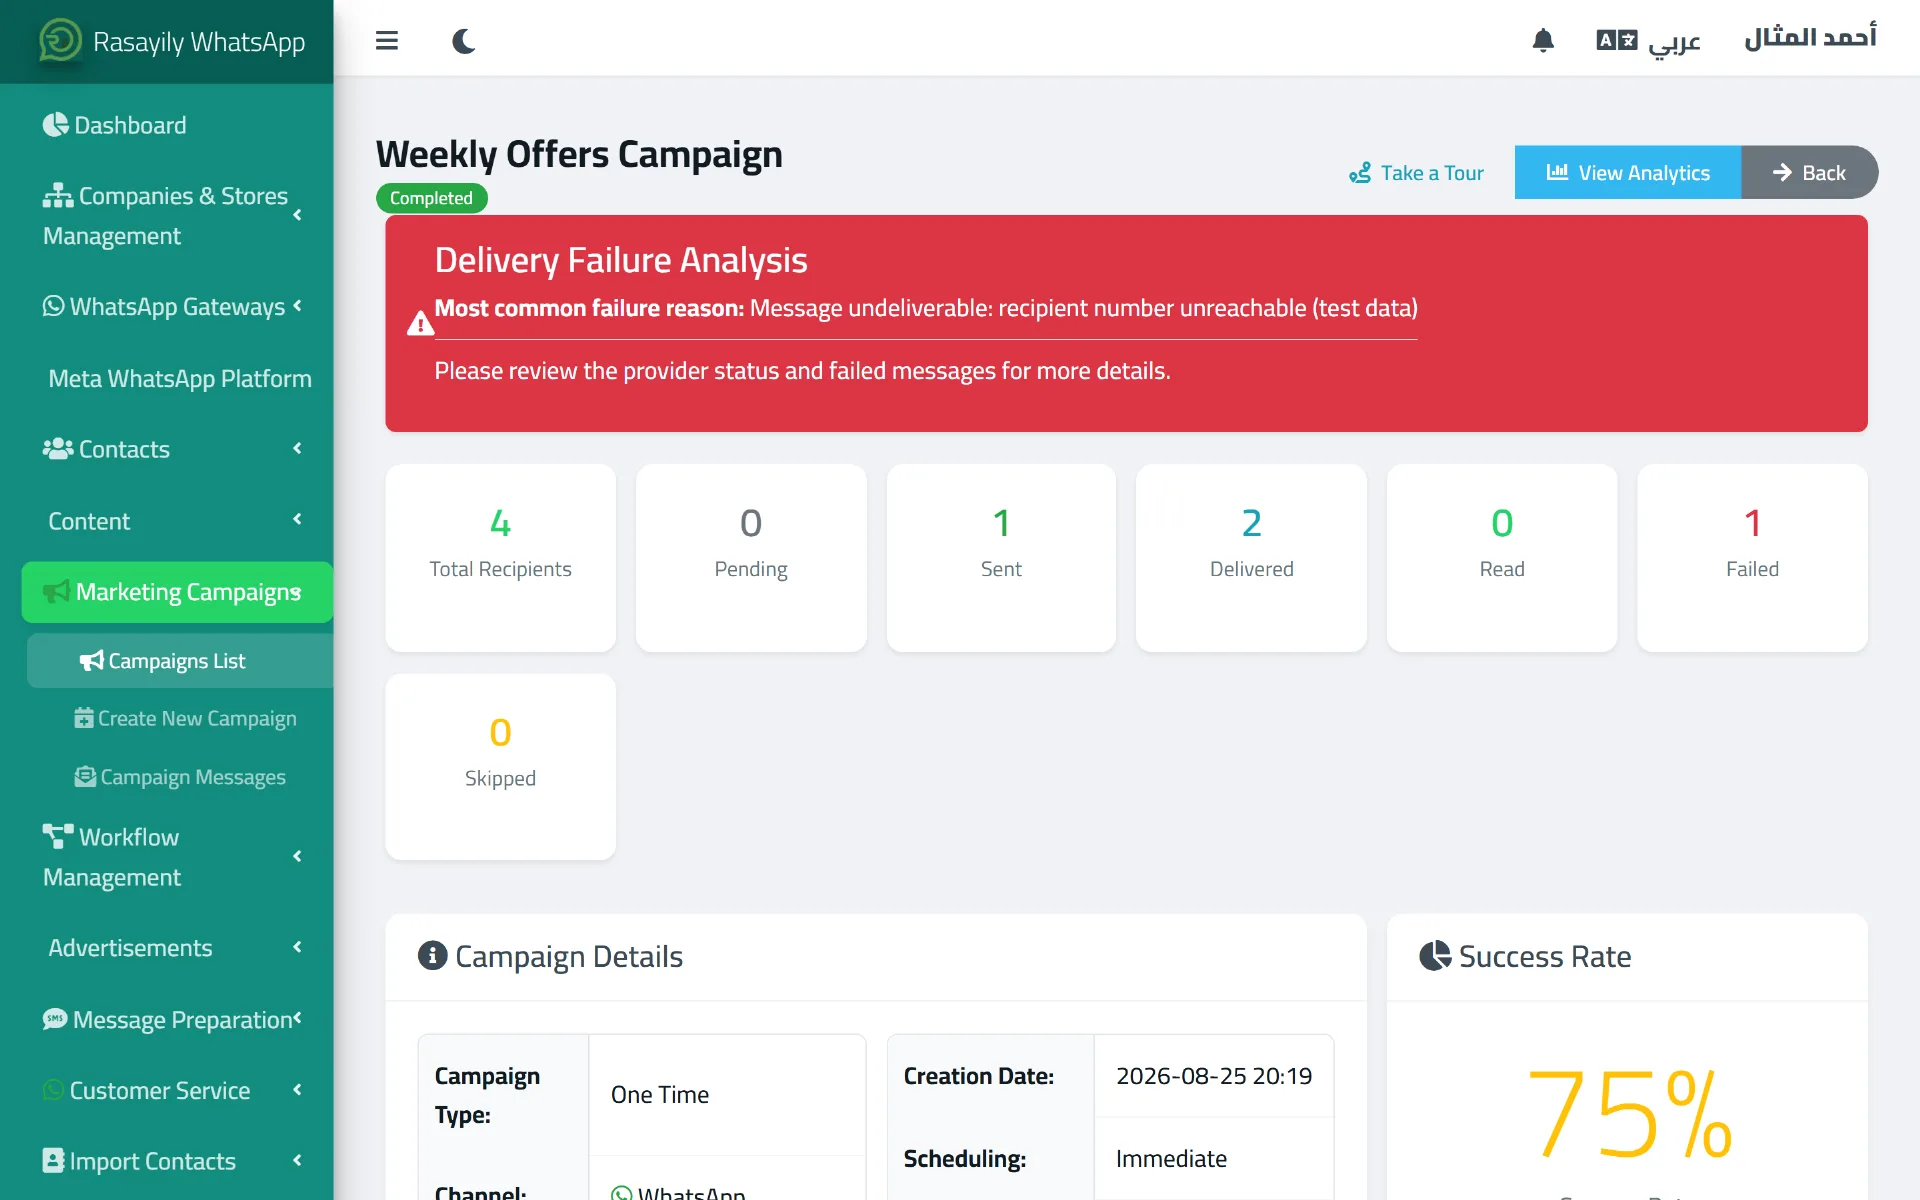
The campaign details page shows how many messages were sent, delivered, or failed, along with a failure-reason breakdown when relevant.
➡️ Next step: if customers reply during or after the campaign, move on to handling customer replies.
8. Handling Customer Replies and Customer Service
Once you start receiving replies from customers, they're managed from the live chat page: conversations arrive in a unified inbox, you can distribute them across your teams, reply to them, and mark them "resolved" once handled. A chatbot feature is also available for automated replies to frequently asked questions. For a full walkthrough of managing conversations and your team, see the Rasayily Customer Service Guide.
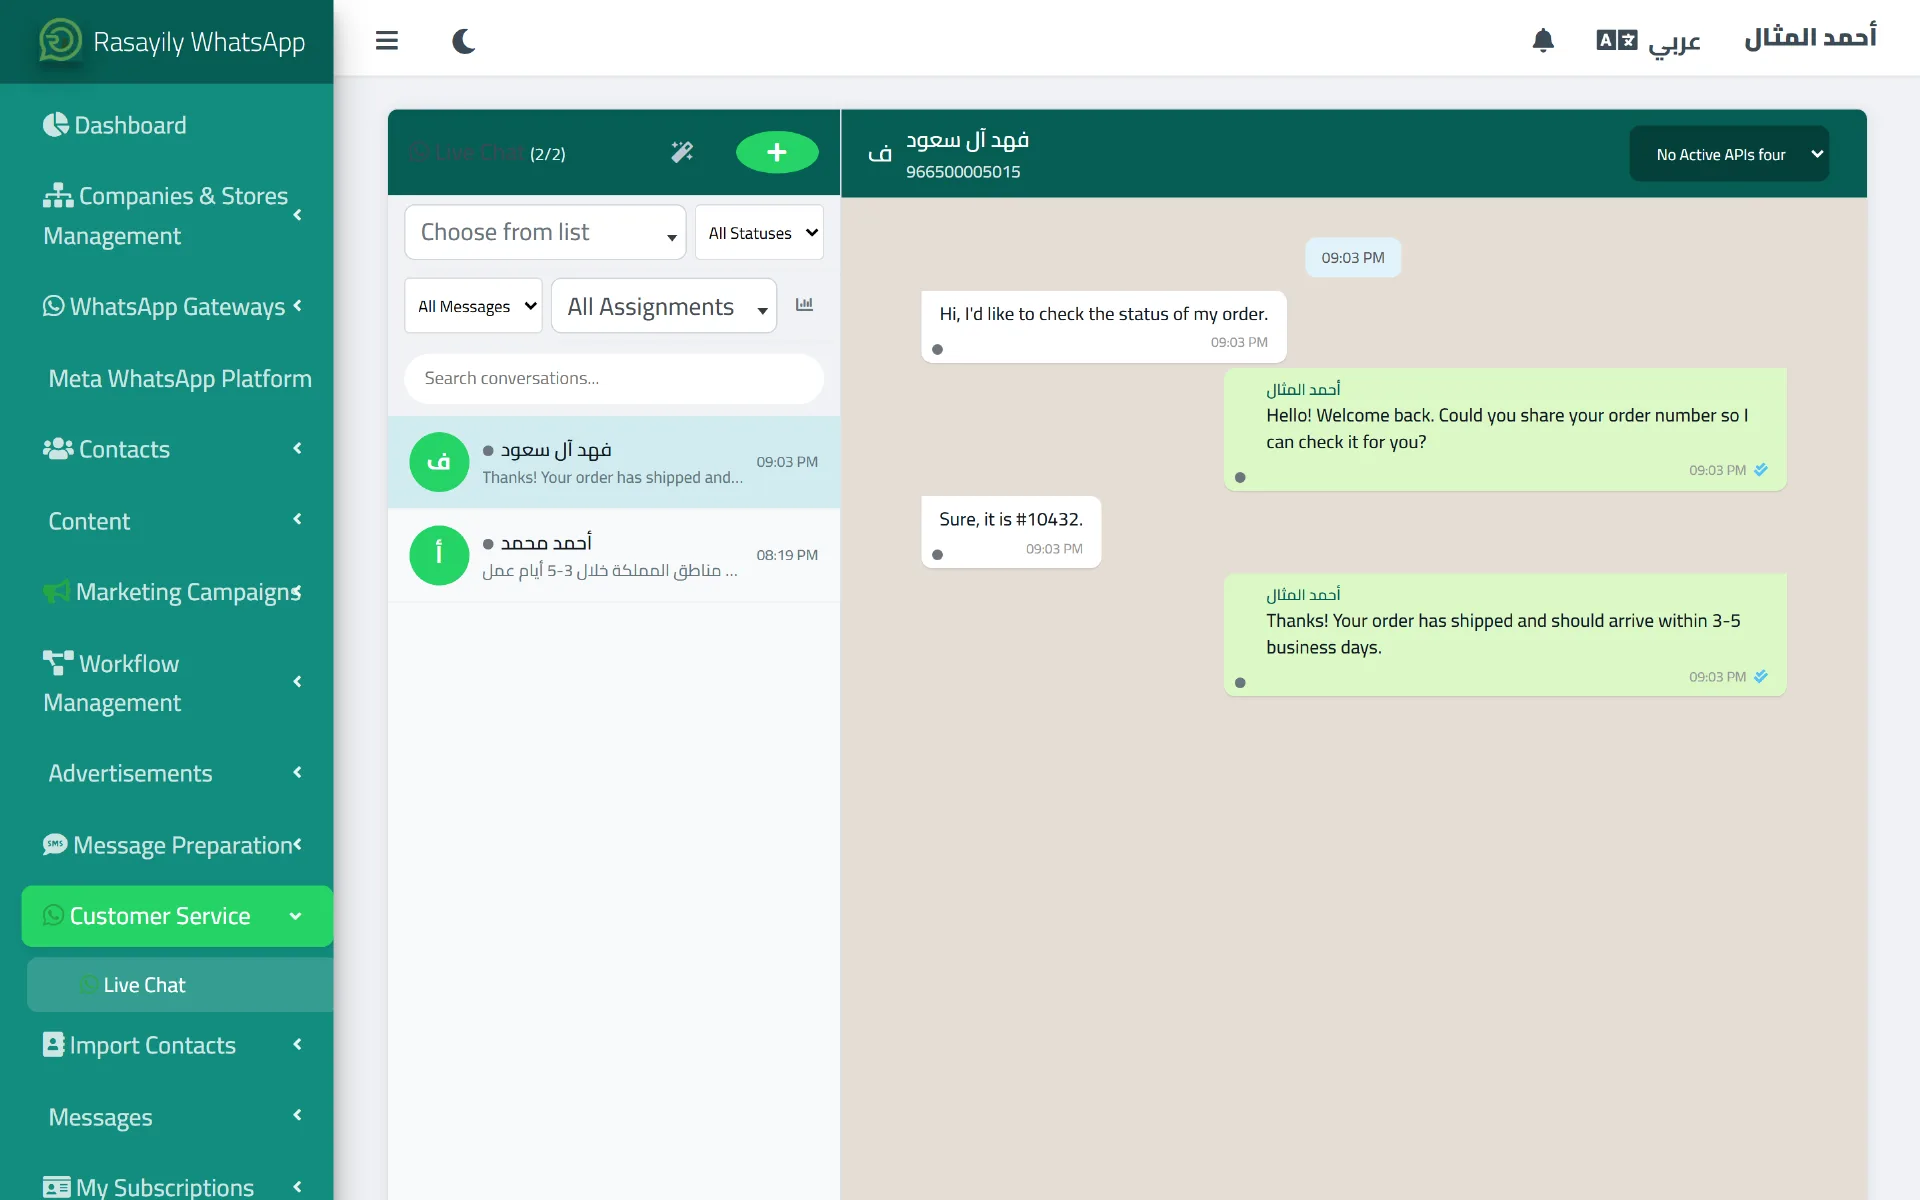
The live chat page lists every conversation in one inbox, and opening one lets you reply to the customer directly.
➡️ Next step: as your team grows, see Managing Staff and Permissions to safely divide roles among them.
9. Managing Staff and Permissions
If your plan supports multiple users, you can add staff to your account from the users list page and assign each one a role and specific permissions (such as company manager, store manager, staff, content editor, or technical support), so each employee only sees the pages and data their job requires. This is separate from customer service "Teams," which are only used to route live-chat conversations among staff.
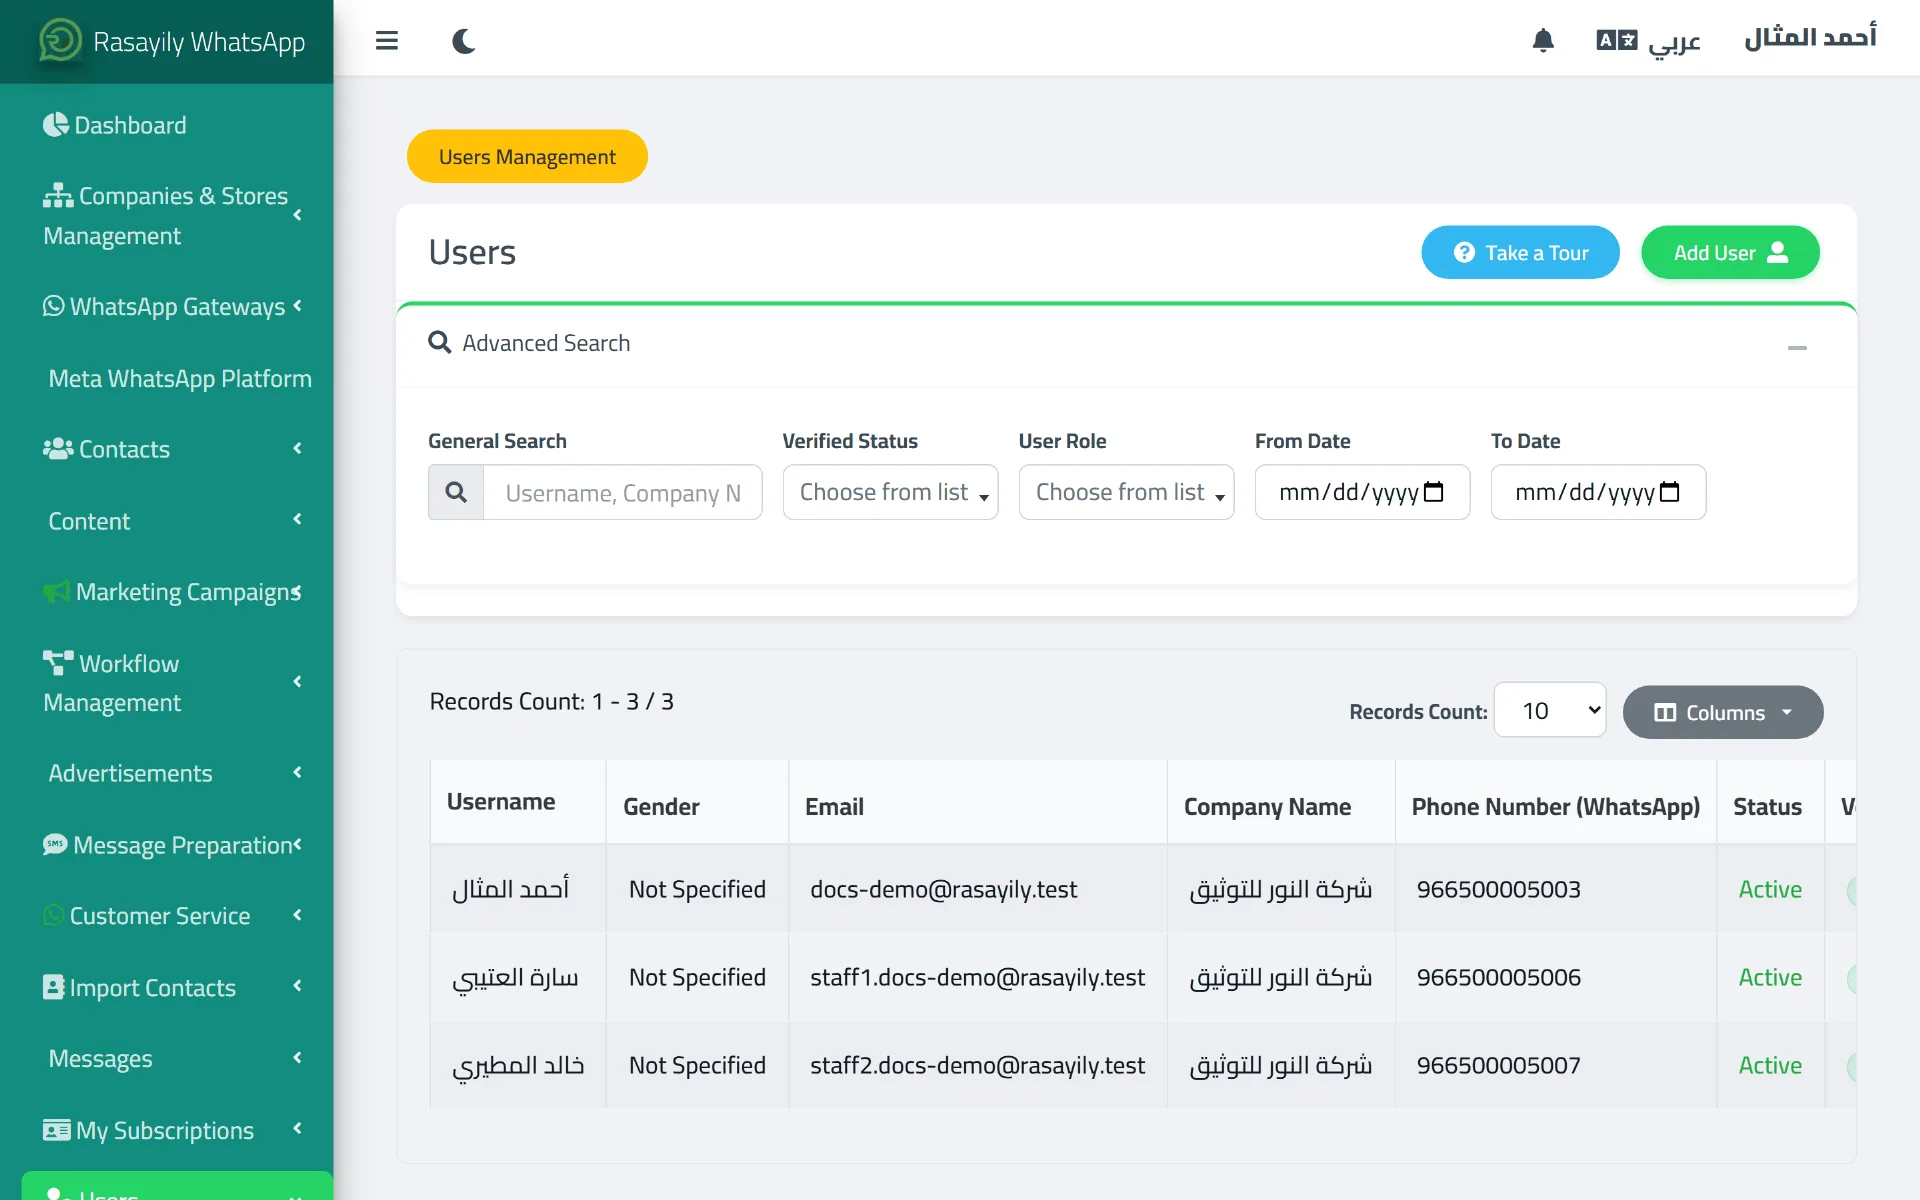
The users page lists everyone you've added to your account — from here you add a new staff member and track each account's status.
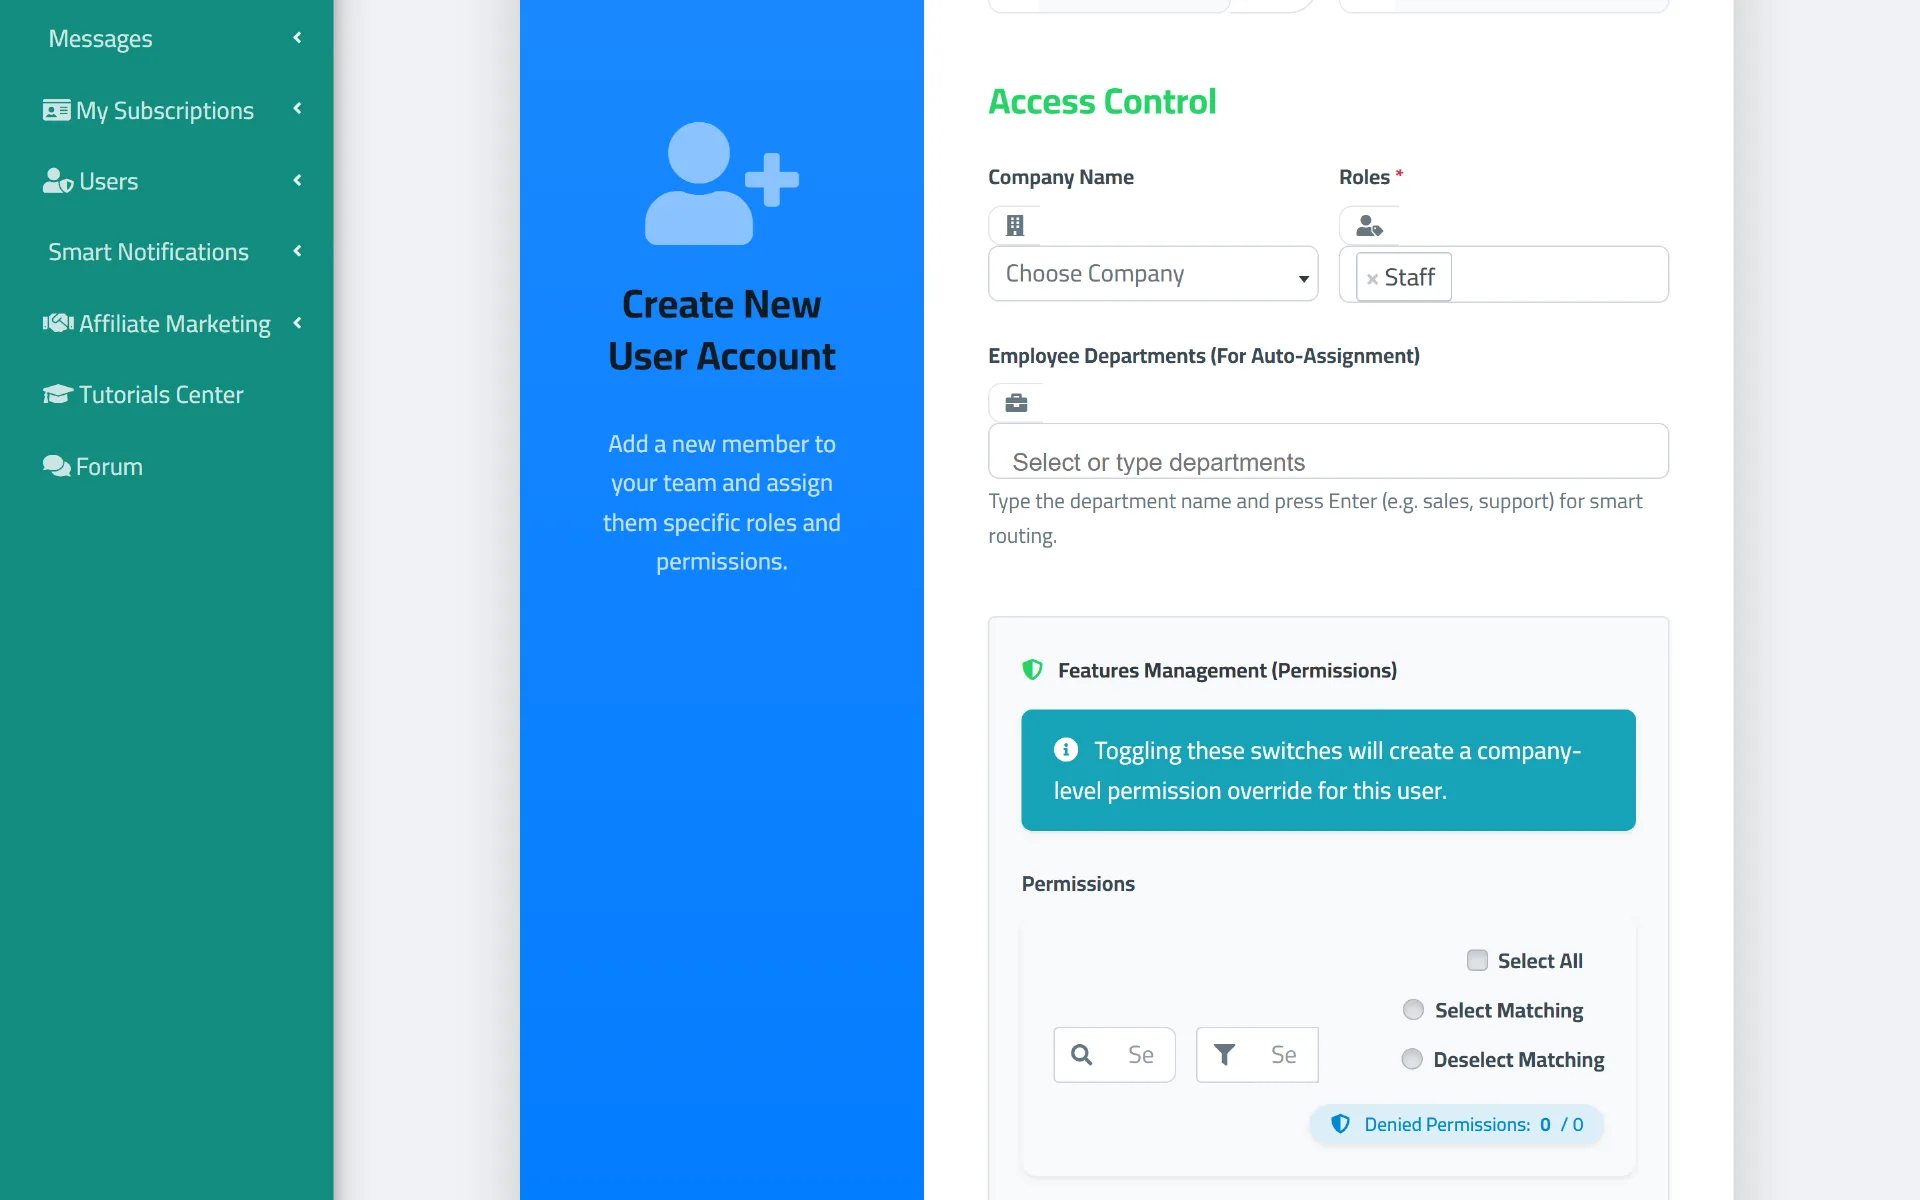
When adding a new staff member you assign them a role (here: Staff), and the "Features Management" section lets you fine-tune exactly which permissions they have inside your company.
Give each employee only the permissions their job actually needs, and never share your own personal login credentials with anyone.
10. Managing Stores
A "store" in Rasayily represents any separate branch or point of sale in your business. If your business has more than one store, manage them from the stores page: add a new store, activate or deactivate it, configure its own settings, and track each store's analytics separately. Some stores also support connecting integrations with external e-commerce platforms from the store's own settings page.
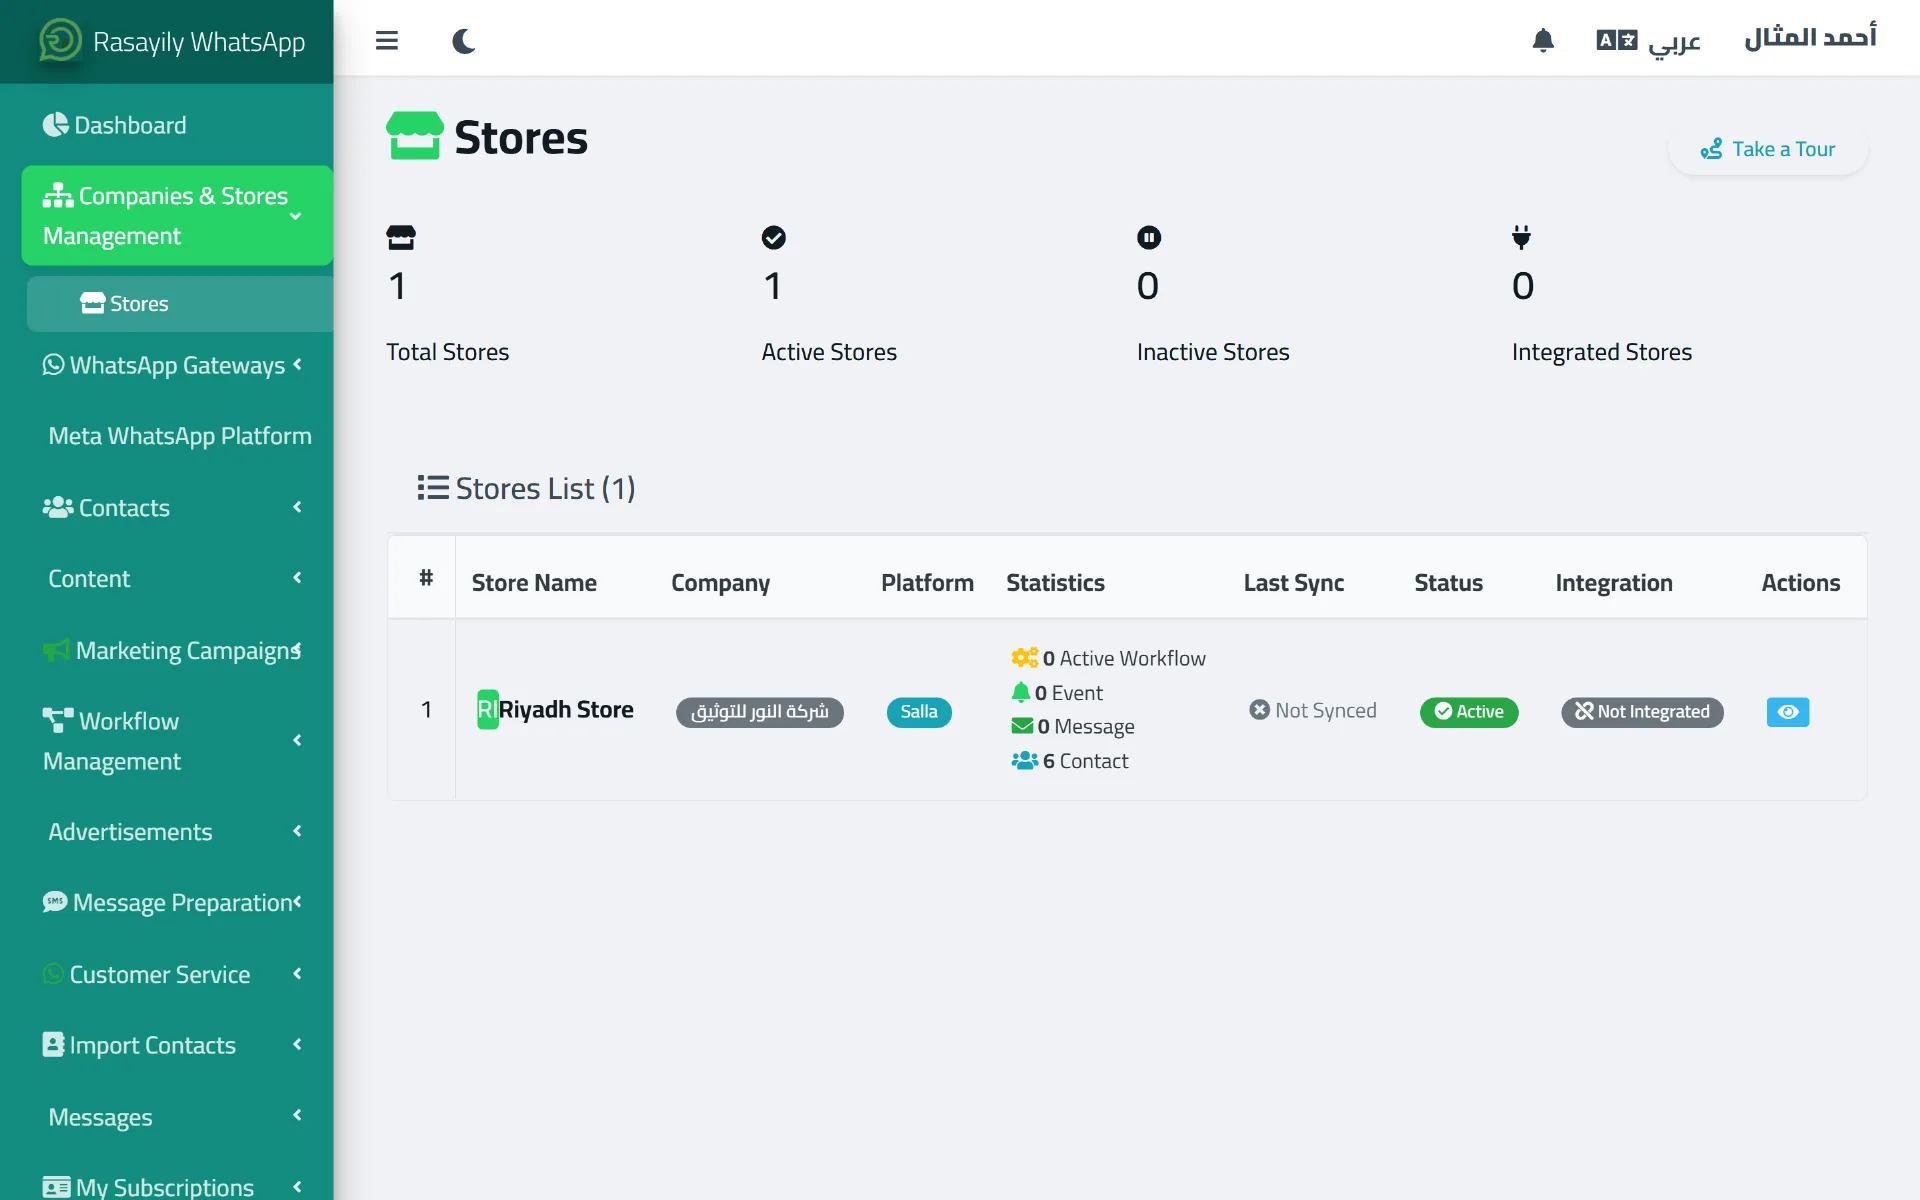
The stores page lists every store you manage, its status, its connected platform (like Salla), and how many contacts belong to it.
Advanced Features and Integrations
These features are meant for users who want to connect Rasayily to other systems, and may require a developer:
- API: a developer guide is available from the "API Developer Guide" page for connecting Rasayily to your own software.
- Workflows: Rasayily's built-in automation tool (condition → action) from the "Workflows" page, with an execution log and analytics for each scenario.
- n8n connection: if your plan supports it, you can connect your account to the external automation tool n8n from the "n8n Settings" page to run more advanced scenarios.
For every other capability in one place, see Why Rasayily.
Practical Examples
Example: A Clothing Store
The store imports its customers via an Excel file, creates a template like: "Hi {{name}} 👋 We've got new offers this week...", then creates a campaign targeting the segment "customers who purchased in the last 90 days," schedules it for Thursday morning, and tracks results from the campaign details page.
Example: A Services Company Using a Fallback Channel
The company creates a reminder campaign with WhatsApp as the primary channel and SMS as the fallback, so if a customer doesn't have WhatsApp active or the message fails to deliver, they automatically receive the same message via SMS with no manual step.
Example: A Business Sending Recurring Messages
Using the "recurring" campaign type, a business can schedule a reminder or update message to the same audience weekly or monthly, without creating a new campaign each time.
Best Practices
Contacts
- Don't import random or non-consented numbers.
- Keep customer data current, and remove or deactivate inactive numbers.
- Use groups and segments to organize your customer base instead of one big list.
- Use custom fields only when you actually need to personalize a message (name, date, membership number...).
Messages and Templates
- Keep the message clear and short.
- Use the customer's name via variables when it adds value.
- Add a clear call to action at the end of the message.
- Don't send unwanted or unnecessarily repetitive messages — this increases the risk of your number being blocked.
Campaigns
- Send yourself a single test message before launching the full campaign.
- Review the target audience and its size before sending.
- Double-check the template, the channel, and the chosen provider.
- Monitor results after sending, and resend any failed messages.
Security
- Never share your account login credentials with anyone.
- Give each employee only the permissions their job needs.
- Periodically review who has access to your account.
Common Problems and How to Fix Them
I can't send a campaign — what do I check?
- Does your current plan allow campaigns and cover the message volume you need?
- Is your WhatsApp number connected and showing "connected" on the connection page?
- Is the template you're using in "approved" status (if it's a Meta template)?
- Does the audience you selected actually contain contacts (check the estimated recipient count)?
- Does the channel you chose (WhatsApp/SMS/email) have an active provider?
- Is there a specific error message shown on the campaign page or in notifications? It usually points straight to the cause.
Some messages failed — why?
This can be caused by an invalid number, a number without active WhatsApp, or a temporary provider outage. Check the message status log on the campaign details page to see the reason for each failure, then use the resend-failed button.
I don't see some sidebar items that my colleague sees
The sidebar is driven by user permissions and the active plan. What you see can differ based on your role (staff vs. manager) and the features enabled on your company's plan.
What Do You Want to Do?
I want to send WhatsApp messages
Connect WhatsApp from the Meta WhatsApp Platform page (Meta) or the WhatsApp connection page (QR), then create a campaign from the new campaign page.
I want to import customers
Go to the contacts page and choose Excel or Google Contacts import.
I want to create a campaign
Go to the campaigns page and click "Create New Campaign."
I want to follow up with customers and reply to them
Go to the live chat page.
I want to manage staff
Go to the users list page in the sidebar (if your plan supports multiple users).
I want to connect an external system
See the Advanced Features and Integrations section above.
FAQ
Do I need a credit card to sign up? No, registration is completely free and no payment details are requested.
Is the free plan activated automatically? Yes, immediately after your account is verified.
What's the difference between official connection and QR connection? See the providers and failover article for the full breakdown.
How do I import contacts? Via an Excel file with the columns above, or by connecting Google Contacts directly.
What's the difference between groups and segments? A group is a static classification you add contacts to manually, while a segment is selected automatically based on conditions you define.
Can I delete my account? Yes, from the profile settings page inside the dashboard.
Where do I find my invoices and subscriptions? In the "My Subscriptions" section of the sidebar.
Where do I get help for something this guide doesn't cover? Check the Tutorials hub inside the dashboard, or contact support.